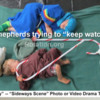
"Flat Lay" (aka "Sideways Scene") Tips and Tricks
There are many options for how to set up your "Flat Lay" sideways scene, record, and interact with the actors and scripture. Sometimes it depends on the passage itself, the age of your kids, and what you want to get out of the activity. Your options may change depending on whether you're creating still "poses" or a video recording. The following tips help you think through some options. Feel free to add your suggestions to the discussion!
In order to fit your scene into what the camera can see from the ladder, you will need to control the size of your "scene" frame or backdrop. 7 feet high and 7 feet wide is a good target size. The higher up your camera is positioned, the larger your scene can be. Use props, marks, or tape on the backdrop to give the actors a reference for the "edges" of what your camera can see.
An offscreen narrator can read the Bible passage. The actors can lip-sync their lines when they hear the narrator speaking them. Consider modifying the Bible passage to include narrator prompts like, "And then turned to Peter and said..." --which cues the actors to get ready to lip-sync their line and act it out as they do.
Do a "warm up" activity for all actors. Have them lay flat on the scene and able to see themselves on the TV. Then run them through a series of "emotions" and "reactions." This will prime their pumps for the story re-enactment. "Show me fear, joy, surprise, pondering." "Show me how you can 'walk off' the scene." "What should you do or look like when this happens in the story: ______________."
After posing/recording a scene, stop for a minute to have the kids decide what the characters are "thinking" and have them write their thoughts on a piece of paper to display like a thought bubble in the next photo.
Let kids "see" how their pose or scene looks AS they position themselves. To do this, connect your cellphone to a TV using the adapter cable described in the above post. This puts them in charge of "getting it right" and the unique and playful perspective will get them to "work" on their poses and actions.
Use a "selfie stick" with a connecting plug that allows you to snap the photo on your phone using a button on the selfie stick. This lets you reach out farther over the scene and still be able to snap the "photo" or record button on the cellphone. A selfie-stick also keeps your photographer from leaning out too far and falling off the ladder ![]()
Selfie Stick Video Recording Technique: Start each scene by pressing the record button on the phone and then extending your selfie stick OUT over the scene (sort of like raising and lowering the camera). Pull it back at the end of the scene to press the "stop" button.
Place a LINE on the bottom of the scene to make it appear like there's a "floor" in the photo. This also gives the actors a reference for where to stand/lay, and makes their anti-gravity moves look even more fun.
Use PAINTERS TAPE to fix backdrops and props to the floor. It's easy to remove.
Interview actors about points in the story while the camera is still pointed at them and connected to a TV.


