
Rotation.org Writing Team
Advent: Isaiah Promised, Jesus Fulfilled
Art Workshop Lesson
Summary of Lesson Activity 
Students will create an "illuminated display" — both literally and artistically — using some clip art, and Christmas lights, and the names of the Messiah (Jesus) found in Isaiah 7, 9, and Matthew 1.
Design options are described below.
Scripture
The "names" for the illuminated text are pulled from the following scriptures:
Isaiah 9:2 (NRSV)
The people who have walked in darkness have seen a great light.
Isaiah 7:14 (KJV)
Therefore the Lord himself shall give you a sign; Behold, a virgin shall conceive, and bear a son, and shall call his name Immanuel.
Matthew 1:20b-24 (NRSV)
...an angel of the Lord appeared to him (Joseph) in a dream and said, “Joseph, son of David, do not be afraid to take Mary as your wife, for the child conceived in her is from the Holy Spirit. She will bear a son, and you are to name him Jesus, for he will save his people from their sins.” All this took place to fulfill what had been spoken by the Lord through the prophet:
“Look, the virgin shall conceive and bear a son,
and they shall name him Emmanuel,"
which means, “God is with us.” When Joseph awoke from sleep, he did as the angel of the Lord commanded him; he took her as his wife,
Notice that Matthew quotes Isaiah 7:14. Our inclusion of this scripture in the lesson is intentional and important in making the Isaiah~Jesus connection.
Refer to the Bible Background for a note about the different spellings of Emmanuel/Immanuel.
Isaiah 9:6-7 (NRSV)
For a child has been born for us, a son given to us;
authority rests upon his shoulders; and he is named
Wonderful Counselor, Mighty God, Everlasting Father, Prince of Peace.
His authority shall grow continually, and there shall be endless peace
for the throne of David and his kingdom.
He will establish and uphold it with justice and with righteousness
from this time onward and forevermore. The zeal of the Lord of hosts will do this.
Objectives
See Bible Background for this set's complete list of objectives.
How-to, and Options for Creating Your Illuminated Displays
 "Illuminated" is an old way of saying "illustrated." Monks in the Dark and Medieval Ages would hand-illustrate pages and particular words and letters of scripture. Included within the text were fancy decorations such as initials, borders and miniature illustrations. That is what your students will be doing with Isaiah and Matthew's names and titles for the Messiah. To further "illuminate" the text, students will incorporate Christmas lights into their display(s). See options below.
The teacher should encourage students to illustrate the titles/names in such a way as to convey the title's meaning. "Mighty," for example, could be illustrated or colored in a "mighty" way.

Because it's Christmas, and we have "seen a great light,"after illuminating the texts, students will be mounting their illustrations on display board and adding, what else, Christmas lights!
They will punch holes around the perimeter of their display board and insert small Christmas lights through the back to create a truly "illuminated" display for others to enjoy and learn from.
 See the hole-punching method below. Also attached to this lesson at Rotation.org, are several graphics which can be printed and enlarged. Refer to the "Notes on the Attachments" at the end of this lesson.

Depending on time, class size, and how many art workshops you will be doing in your Rotation, you have some options for how the final projects are displayed, or if they go home.
- You could have each student create their own, and either display it at church or take it home.
- You could have students work together (recommended) and display it at church.
- You could add additional images, and have one class work with the manger, another with Jesus, and another with the star.
- Advanced students with plenty of time could draw their own illustrations, incorporating the all-important words from scripture into the drawing, or making the drawing itself out of text.
The size of the displays is your choice as well.
You could cut the display board into 18" x 18" sections, and let each student work on their own illustration, and paste it on their individual section, OR you could paste several student illuminations onto one large display board and surround it with lights.
How to punch holes in the cardboard to receive the Christmas lights:
We don't recommend just using your hands and a sharp object to poke through the display board! Instead, set up a "hole punching table." Working together, students or helpers slide a small but sturdy box under the display board while another student taps a fat nail through the cardboard. The box underneath keeps the cardboard stiff for easier punching, and keeps the nail from hitting the table. The nail needs to be about 1/4" wide so that the hole will hold the small "twinkle" Christmas lights you will poke through the hole from the back to create the illuminated display.
Boxes: Plastic electrical boxes from the hardware are the perfect size for punching holes, and they inexpensive. Alternately, a handy-person could quickly nail together a 'triangle of 2' x 4' x 10" pieces of wood to create a jig for keeping you from nailing into the table.
Preparation
- Read Bible Background, scripture and this lesson.
- Prep the display boards and gather the materials.
Materials List
- Display board (student-style "project boards" work great)
- Sturdy boxes to place underneath cardboard for hole punching (See "Boxes" note above.)
- Hammers and fat nails for punching holes
- Printed copies of Jesus graphics (examples attached to this lesson at Rotation.org)
- Print the Scripture Page attached to this lesson at Rotation.org (one copy per student)
- Markers for Illustrating
- Paper, white
- Scissors
- Christmas lights (the small kind) and extension cord. We suggest you ask church members to donate a string (everyone seems to have an extra string!)
- Hardware to hang the display.
Lesson Plan
Open
Welcome students and describe today's Art Project.
Practice making illustrated text:
Hand out markers and pieces of paper and tell the students to "creatively write the following words so that letters look like the thing the word is describing." Offer them an example, such as the word "mighty" drawn in a strong way with bold colors. After they have done "mighty," introduce additional words and phrases from Isaiah, such as, "great light," "peace," and "counselor" (that's a hard one, so as with the others, make suggestions, like, "how about adding hands to the word that reach towards each other?")
Read and Circle the Keywords in the Scriptures
Give students copies of today's scriptures. Preface the reading by saying the following:
700 years before the birth of Jesus, the prophet Isaiah wrote these words foretelling the coming of a great leader who would save people from their sins. Isaiah used many different titles and names to describe this leader. I want you to HIGHLIGHT those names as you read them in today's scripture.
Together we describe this leader as The Messiah, which is a Hebrew or Old Testament word that means "Anointed One." In Latin, the language of the Roman Empire, Messiah was spelled Savior. And in the language of the Greek Christians, Messiah was spelled, Christ. Messiah, Savior, Christ all mean the same thing: God's Anointed or Chosen One. So who do you think Isaiah was talking about, 700 years before he was born! (Jesus!)
Now take turns reading through the scriptures and instruct the students to HIGHLIGHT the descriptive names Isaiah uses to describe the Messiah. Their highlighted scriptures will become their source for creating the illustrated texts in the art project.
Last step before creating the display
Ask: How would you illustrate some of the words you just highlighted?
Immanuel? Everlasting? "Wonderful"?
During this last step is a good time to reinforce what these words mean. For example,
- What would a "Prince" of Peace do? and not do?
- What would God the "Wonderful Camp Counselor" be like?
- What does the word "everlasting" mean? (Eternal, but also "doesn't give up")
- And finally, point out that Isaiah seems to be telling us that this coming leader, this Messiah, would be GOD HIMSELF. Who does this mean Jesus really is?
Illuminate!
See the "How-to and Options" section above for your options and more details.
Distribute paper, the attached clip art (if using) and display boards, and explain how their illuminated text will be assembled on the display board and illuminated with Christmas lights.
With the kid's highlighted scripture in hand from the previous step, get them started illuminating the text. Encourage them to illustrate concepts, and not just spell them.
Depending on the age of your students, and time, you may want to have a helper begin punching the holes in the display board(s).
Light It Up!
Plug in your Names of Jesus display and admire everyone's work.
Now pull out the "blinking" bulb that is always included in the little plastic pack of extra bulbs with Christmas lights (it's usually the one with the red stripe). Tell your students the following before putting the blinking bulb into the string of lights:
Say: As Christians, we think Jesus is more than just a great role model. We think he is more than just a great teacher. We make an amazing claim: that in baby Jesus — God was coming into our world to be with us in a special way, in the flesh (incarnate). That's the great "secret" of Christmas that most people don't think about and we are called to bring attention to.
Put the blinker bulb in the display. Ask them what their families and church are doing to call attention to and celebrate God coming into the world in a special way through Jesus. (If students will be finishing this step at home, tell them how to swap in the blinking bulb with a parent's help.)
Invite everyone to pray with you that OUR lives and Christmas celebrations would call attention to God's wonderful, mighty, everlasting, peace-bringing presence in the world through Jesus the Messiah, the Savior, the Christ, our Lord.
Additional Suggestions
Christmas twinkle lights are inexpensive after Christmas. Alternately, some church members will have extra strings, and you could ask parents to send their student with a string of lights that will come back home with their project.
For a large display of many illuminated texts, you could get the larger old-fashioned Christmas lights with the clips and clip them to your display board.
Adaptations for Young Children: For those who can't write, print the "Names of Jesus" graphic seen in and attached to this lesson. Have them color it and paste it to a display board.
Notes on the Attachments to this lesson at rotation.org
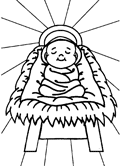 Attached at the bottom of this lesson are several printable graphics you can print and enlarge on a copier for students to incorporate into their displays. They include two different versions of the Manger and Jesus graphics. One version is a printable black and white image that students can add to. The other is a greyed out version which students can use as a guide, but add their own color lines or lines made out of scripture.
We've also attached several "mock ups" of what your project could look like. These are also displayed in this lesson plan. One is the face of Jesus with his name spelled out using scripture from this lesson. The other is the face of Jesus with no words added. These are simply suggestions to stoke creativity. Use them as you will.
Last but not least, we've included a printable scripture handout for students to highlight in the Opening Bible Study.

Written by: Adapted by Neil MacQueen from a lesson written by Carol Hulbert.
Jesus word image copyright Rotation.org
Baby in a manger (free) image from colorkiddo.com
Jesus face (free) images from clipart.com
Illuminated scripture image from the Book of Kells via Wikimedia Commons.
Mighty God image copyright FUMC, Ann Arbor, MI.
Copyright © Rotation.org
Printed from https://www.rotation.org


