the perfect Art Lessons, Ideas, Activities, and Resources for the Lord's Prayer

Post your Sunday School Art, Textile lessons, ideas, activities, and resources for the Lord's Prayer.

  • Please include a scripture reference, supply lists, sources, suggested age range. age modification, etc.
  • Photos are much appreciated!  Click "attachments" and upload to your post.
  • Please be careful not to post copyrighted materials. Excerpting and paraphrasing is okay. Include attribution.

    Lord's Prayer - Matthew 6:9-13, Luke 11:1-13, Our Father, who art in heaven, Kingdom come, How to pray, etc.

Bible lessons and ideas about the Lord's Prayer -with Art, craft, painting, construction, drawing, etc.


The Lord's Prayer

Art Workshop

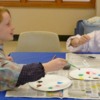
Summary of Lesson Activities:DSC03750
Decorate prayer rocks and children will receive a copy of  "The Prayer Rock Poem." 

Scripture Reference:
Matthew 6:9-13, Luke 11: 1-4

Key Verse:
The Lord's Prayer

Workshop Objectives — After completing this Rotation, participants will be able to:

  • Name that the story is found in the New Testament. Identify the four Gospels.
  • ŸFor 3rd grade and up: Locate the story in Matthew and in Luke.Ÿ
  • Define prayer as a means of growing a personal relationship with God: talking and listening to God – any time, any place, and about any thing.
  • Retell the story in his/her own words of the disciples asking Jesus to teach them to pray, and Jesus’ response, known as the Lord’s Prayer.
  • Describe the Lord’s Prayer as universal, spoken in languages around the world, uniting Christians in their faith.
  • Discuss the meaning of portions of the Lord’s Prayer.

Supplies:

  • Easel; easel paper & appropriate makers; Sticky-Tack to hang paper
  • Bibles
  • Copies of the Lord’s Prayer on “scroll paper” (to hand out at end)
  • One rock per student (each about 2 by 2 and 1/2 to 3 inches, light colors are best)
  • The pray rock poem (one per student) - see end of lesson
  • Paper towel, one sheet per student, permanent marker
  • Acrylic paint in a variety of colors including primary colors and at least one bottle of white and one of black (Opaque colors will show up best.)
  • Small containers for water – one for every 2 students
  • Paint brushes - 3 per student
  • Paper plates – one for every 2 students
  • Table covering to protect tables
  • Scratch paper and pencils (optional)

Leader Preparation:

  • Read the scripture for this lesson.
  • Read and reflect on the overview material provided for this lesson.
  • Gather the above materials.

Before Start of Class:

  • Wash the rocks and allow plenty of time for them to dry.
  • Write in large letters, the Lord’s Prayer on a piece(s) of easel paper and post it on the wall where it can be seen.
  • Spread the table covers over the tables.
  • For 3rd grade and up: distribute Bibles around the tables.  Write on the easel “Luke 11:1”  and  “Matthew 6:9”
  • Fill water containers half full. Prepare one cup for every 2 students.
  • Prepare paint palettes – one for every 2 students and set aside.  To prepare: Shake paints and place a quarter-sized squirt of red, yellow and blue paint distributed on a paper plate. Also place a dime-sized dollop of white and of black.  Hold-off on other colors for now.
  • Have other supplies ready but set aside.
  • Bookmark the division between the Old and the New Testament. Also bookmark Matthew 6:9 and Luke 11:1


Lesson Plan

Opening – Welcome & Lesson Introduction:

Greet your students warmly, introducing yourself and any other adults.

[Note: The Shepherd will be taking care of attendance, nametags, and any visitor cards. This can all happen quietly while you are starting your lesson.]

Say: This month we are learning about the Lord’s Prayer. [After the second week instead ask: What are we learning about this month?] Today we are going to make prayer rocks that will help us remember to pray. You can each decorate one rock with paint. Let’s start with prayer.

Ask for any prayer requests.  Ask students to say their name and then their request.  [It is okay if you write these down.]  Ask if anyone would like to help you say a prayer.  Use the Lord’s Prayer as the ending.  A prayer suggestion: “God, Thank you for teaching us how to talk to you in different ways.  May we pray to you with our whole hearts, giving thanks for all of the wonderful blessings you have given to us.” (Pray for requests.  End with the Lord’s Prayer.) Amen.

Dig - Main Content & Reflection:

Ask:  When you think of prayer, what comes to mind? (allow a few answers)

Say:   Prayer is talking and listening to God. Prayer is communicating with God.

Ask: What is the Lord’s Prayer? (a prayer we say together in church)
Why do we call it “the Lord’s Prayer”?

Say: We call it the “Lord’s Prayer” because Jesus taught it to the disciples.  Jesus and God are often called “Lord.”  Let’s read in the Bible about Jesus teaching his disciples to pray.

Ask:  Since this is a story about Jesus, where would we find it – in the Old Testament or the New Testament of the Bible? (in the New Testament)

Do: As you say the next words, show the portions of the Bible that are the OT and the NT.

Say: The Bible contains two Testaments or two major sections  – the Old Testament and the New Testament. The New Testament includes stories about Jesus.

Ask: What do we call the part of the New Testament where we find the stories about Jesus? (the Gospels)

Say:  The word “Gospel” means “good news.” The first four books of the New Testament tell the story of the good news about Jesus. It is indeed good news that Jesus taught us how to pray.

For 3rd through 6th graders:

Do: Make sure that everyone has access to a Bible.

Ask: What are the names of the four gospels?  

Can anyone tell me in which Gospels we find our story? (Matthew and Luke)

Do: If necessary, teach them the quick way to find the New Testament. [1]

Do: Have everyone count off “1-2.”  Have all of the “1’s” find Luke 11:1 and the “2’s” find Matthew 6:9.  (Refer to the easel.)

Say: Follow along as I read these passages to you.  I will start with Luke.

Do: As you reading the passage in Luke, ask everyone who has found Matthew, to look at a neighbor’s Bible.  Read Luke 11:1-2a  [Luke: 11:2a = “He said to them, ‘When you pray, say.”]

Do: Then have those who found Luke switch to look at a neighbor’s Bible while you read Matthew 6:9b-15. [Matt 6:9b = “Our Father in heaven…”]


[1] Opening the Bible in middle lands you usually in Psalms. Taking just the back half and finding middle of that, gets you to beginning of NT. 


For 1st and 2nd grade:

Say: Jesus teaching his disciples how to pray is found in the book of Matthew and Luke in our Bible. Listen as I read to you from the Bible in the Gospels of Luke and Matthew.

Do:  Read Luke 11:1-2a and Matthew 6:9b-15.  [Luke: 11:2a = “He said to them, ‘When you pray, say.” Then continue reading with Matt 6:9b = “Our Father in heaven…”]

For all students - Initial Discussion:

Ask: Have you ever heard that prayer during the worship service?

Say: What we say as the Lord’s Prayer is slightly different than what I just read. We will talk some more about the Lord’s Prayer as we paint our prayer rocks.

Ask:  I wonder what a rock has to do with prayer? (accept a few replies)        

Say:  Let me read to you a poem that you can take home with your prayer rock.

Do:  Read the prayer rock poem. (See end of lesson.)

Say:  We can call these our pillow prayer rocks!  It sounds like a fun way of being reminded to pray. Let’s start our art project: painting our pillow prayer rocks.  You may decorate your prayer rock in whatever way that you’d like.  Because paint takes time to dry, you’ll only be able to decorate one side of your rock.

Do:  Distribute to each child a sheet of newspaper, a piece of scrap paper, a pencil, and a paper towel.

Say:  I am handing out some scrap paper in case you want to doodle some ideas for what to paint on your rock.  The Shepherd(s) will be coming around a writing your name on the piece of paper towel.  We also have paint smocks to wear.

Do: Distribute paint smocks. Show them the supplies they can use. Explain how every two students will be sharing a palette of paint.  Distribute six paintbrushes with each palette. Point out how time will be saved if each brush is used for one color on the palette (less washing of brushes).

Do:  Distribute one rock per student.  Ask them to work with their rock on the paper towel.

Art tips:

  • Encourage imagination.  (Imagination is that part of your brain that allows you to see animals and funny faces in the passing clouds!)
  • Light pencil sketching on the rock is okay.
  • Several thin coats of paint are better than a gloppy, thick coat (although each coat should dry before applying another coat – use the hairdryer.)
  • Avoid trying to use the paintbrush to “sketch” (i.e., lifting the tip as you make short strokes).  Instead, place a loaded brush on the rock and pull out gently but firmly.  This gives better control.  (Demonstrate this on the easel with a dry brush).
  • To create straight lines hold the brush nearly perpendicular (“straight up and down" to the rock).  Suggest testing out brush strokes on the newspaper.
  • “Big to little.”  Paint in the large areas first.
  • Encourage creating more colors on the “palette”  (the plate) by mixing colors.  Add white paint to make a lighter color, black to make a darker color.  If students would like other colors you may offer them.
  • Add details:  Outlining with a different color can help to highlight and create depth. Darker and lighter shades provide contrast.  (However paint should be dried before another color is added on top or next to – use the hairdryer)

Discussion: (work in these questions while the kids make their projects)

[Note:  Some banter between students about off-topic material is ok however don’t miss what is an opportune time as the students work!  It is the story discussion that can prompt God’s character to be revealed.]

Say:  While you work I am going to ask you some questions about prayer.  We had described prayer as a way of communicating with God.

Ask: Why do you suppose we would want to communicate with God? (accept replies)  

P1000573Say:  Prayer makes our relationship with God stronger! 

Ask: How do you get to have a close relationship with a friend – like if you have a really good friend – how did you become close friends?

Say: That’s right, to become close friends you had to spend time together, you did things together including talking and listening.  God really wants to have a close relationship with us!  He wants very much to hear what is on our minds.

Ask:  Can you imagine trying to have a best friend without talking with them?

Say:  So prayer is communicating with God.  We may not be able to call God on the telephone or send him a letter, but prayer is just as real as an email. God hears us!

Do:  Tell a story about a time when you felt that God heard your prayer.

Ask:  Can you pray when you are happy? What about when you are sad, or in trouble? What about when you are mad?

Say: We can pray to God anytime and about anything!

Ask:  Do you suppose that there are Christians who read the Bible in name the closest town to yours?  What about in name a near by state? In Canada? In South America? In Germany? In Africa?

Say: If people read the Bible all over the world then they’ve heard about Jesus teaching us to pray!  That is amazing isn’t it – the Lord’s Prayer is said all over the world!  That really brings Christians all around the world together!

Ask:  I am wondering if anyone can ask me a question about what parts of the Lord’s Prayer that they maybe don’t understand?  (Use the Bible Background materials to help you answer questions.  You may need to prompt the questions by asking one yourself.)

If you have extra time:

ŸHave students add detail to their work.  See painting tips above.

ŸHave students share their work with the class, explaining about their choices.

Closing:

Say: Use your prayer rock to remind you to talk to God in prayer. 

Do:  Read the prayer rock poem again.

Say:  God loves you. God would like very much to hear your prayers.

Do:  Hand out a copy of the prayer rock poem and (if students have not yet received one) a copy of the Lord's Prayer.


The Prayer Rock poem:
(source unknown)

I’m your little prayer rock and this is what I’ll do.
Just put me on your pillow ‘till the day is through.
Then turn back the covers and climb in your bed.
And “WHACK” -- your little prayer rock will hit you in the head.

Then you will remember as the day is through,
to kneel and say your prayers as you wanted to.  
Then when you are finished, just dump me on the floor.  
I’ll stay there through the night to give you help once more.  

When you get up in the morning, “CLUNK”, I’ll stub your toe.  
So you will remember your morning prayers before you go.

Put me back upon your pillow when your bed it made.
Your clever little prayer rock will continue to be your aid.
Because your heavenly Father cares and loves you so.
He wants you to remember to talk to him, you know.


Resources:
  • Lake, Jane. “How to Paint a River Rock.” 2010.  <http://www.allfreecrafts.com/nature/river-rocks.shtml>.
  • MacQueen, Neil. “Lord’s Prayer – Lesson Outlines.” Rotation.org. 2001.
  • Marshall, Jan. “The Lord’s Prayer Lesson Set.” Rotation.org. 2002.
  • Welford, Lin. Rock Painting Fun for Everyone!  Green Forest, AR: ArtStone, 2006.

Blog button for FamilyFaithCompanion.org

Other resources:
Visit Carol's blog – where we encourage parents to continue the learning at home. (Conflict of Interest Disclosure: None. Carol does not make any money from her blog. Any ads you see are placed there by Wordpress.)

Comments from others on making prayer rocks:

from Neil MacQueen

  • Worked great.  I was really surprised how well the older ones enjoyed making the rocks.
  • IMPROVEMENT MODIFICATION: We used hairspray to give sheen and "set" the colored markers we used on the rocks.

from Luanne PayneRock Scavenger Hunt

  • Loved this!
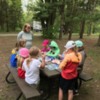
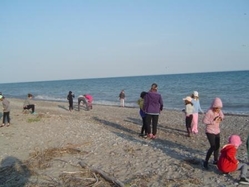
    We did it at our girl's (ages 7-9) spring camp at the local provincial park. On the Friday evening we went on a scavenger hunt, the girls searched for their perfect "light gray colored" rock at the park's lake beach.

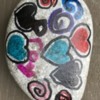
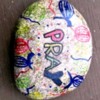
    Prayer Rocks at Spring CampSaturday morning after breakfast we decorated them.  We used permanent Sharpie markers and sealed them with Gloss Decoupage Glue (the bottle indicated it would work on most things and it did!).  They decorated both sides, one around the word "Pray" and the other around their name.Prayer Rock 2

    Only had to wait a couple of minutes for the marker art work to dry, then I went around the table and simply squeezed a few drops of glue right from the bottle directly onto their stone drawing and they used a foam brush to spread it thinly over the top and sides.  A few minutes later they flipped Prayer Rock 1them over and I dropped glue onto the other side and again they smoothed the drops over their rock.  The marker never smeared.

    They glue dried really quickly. We also gave the girls a laminated mini copy of The Prayer Rock Poem and a small baggie to store them in. Here is a link to a pdf of The Prayer Rock Poem (6 per page) you can print and laminate.
Have you made prayer rocks? Add your comments below by clicking on "Post Reply." (A moderator will later add your comments to this post.)

A lesson written by Carol Hulbert from
First United Methodist Church

120 S. State Street Ann Arbor, MI 48104

Copyright 2002, 2013 First United Methodist Church, Ann Arbor, MI. Permission to copy materials granted for non-commercial use provided credit is given and all cited references remain with this material.

Attachments

Last edited by Luanne Payne
Original Post

Replies sorted oldest to newest

[moved to this Art forum by volunteer moderator, I am not author of this lesson.]


The Lord's Prayer
Art Workshop 

Summary of Lesson Activities:

Children will each create a square for a thankful quilt.

Scripture Reference:

Matthew 6:9-15

Memory Verse:

the Lord’s Prayer Matt. 6:9-13


Supply List:

  • 12”x12” squares of white cotton-one for each child.
  • Decide if you are going to do an appliqué or a patchwork-style quilt.
    If appliqué- you may want to hem the squares with a ¼ hem on all sides.
  • Fabric markers or fabric paint
  • Cardboard-one piece for each child
  • Pencils
  • “prayer hand” pattern (do an internet search using the term “prayer hand”. You will see examples of hand outlines with a prayer category listed on each finger. They are intended to be reminders of how to pray).

Leader Preparation:

  • Read the scripture ahead of time.
  • Gather the materials.


Presentation

Opening-Welcome and Introductions:

Greet the children and introduce yourself.

Open with a prayer.

Dig-Main Content and Reflection:

Read the scripture:  Matthew 6:9-15

NOTE: Be sure the children know the actual words to the Lord’s prayer. Often, they miss-hear them and that is a hard habit to break.

Application:

Explain to the children that today they will be learning about prayer. 

Ask the following questions (Accept any answers. The answers in parentheses are possible answers to help guide them. You may have others to add):

  • Why do we pray to God? (We need God’s help and guidance every day and God wants to know what is on our hearts.)
  • What do we do when we pray? (When we pray, we give God thanks, we pray for the needs of others and ourselves, we adore God, and we confess our sins.)
  • How do you pray? Are there any special prayers that you say at your house?
  • When do you pray? What do you pray about?


Explain that Jesus had many people that followed him and listened very carefully to what he was teaching. One day, he taught the people about prayer. He told them that they didn’t need a bunch of fancy words to talk to God. They didn’t even have to have their prayers memorized. They just needed to tell God what was on their hearts. Jesus showed them what he was talking about by saying a prayer for them We call this prayer the Lord’s Prayer. Ask them if they remember hearing this prayer during our worship service?

Activity:
We are going to decorate white squares which will be made into a quilt to hang in the Gathering Room.

  1. Tell children they will be making squares for a quilt that will decorate the Gathering Room when it’s all done, so they should do their best work because everyone will see it.
  2. Lay each square over a piece of cardboard, secure with small binder clips, one on each side
  3. Each child should trace his/her hand onto the cloth, using a dark-colored fabric marker. Tell them they can use a variety of colors for step
  4. Using the “prayer hand” as an example, ask children to write a one-word response on each finger of their own, drawn hand. i.e, in response to thanks, they should ask themselves, “what do I thank God for?”, then write the answer on one of the fingers. To adapt this for non-readers, adults and/or older children can help by asking the children the questions and writing down their responses. The young children can choose which color they would like used for each response.
  5. Have each child write his/her name on the cloth, either on the palm of the hand or directly underneath the hand. Leave about ½ inch around each edge for sewing.
  6. Find a safe place for the squares to dry.
  7. Older students are going to be given the opportunity to do this, also, so once the squares are dry, they will be stored until all squares are done.


Reflection: Remind children that prayer is talking to God and that God wants to hear from us all the time. We can and should talk to Him as much as we want to. If time, ask for highs and lows.

Closing: 

End with the Lord's Prayer.

Notes:

We will be attaching the white squares to some fabric that has the look of stained glass. We will be hanging this in our main Gathering Room/Fellowship Area once it is complete.


Resources:

I adapted this lesson from something I believe I got on this site. However, I cannot find where I got it so if anyone recognizes it, please let me know and I'll credit the source. Thanks! 


A lesson written by Sharon Yacoviello for Spirit of Joy Church,
Indianapolis, IN

A representative of Rotation.org reformatted this post to improve readability.

Last edited by Luanne Payne

Other Art Ideas for the Lord's Prayer...


Anglican Prayer Beads

Question: I would like to add a craft to one of our Lenten lessons to include Anglican Prayer Beads. I have found some good instruction and ideas on how to make them, but I need some simple prayers for 8 and 9 year old children to recite with their beads. Any ideas?

Responses:
  • By Hilary Schroeder: Since you are doing this in Lent, find some prayers from devotional books written for kids at their level. Creative Communications for the Parish, Augsburg Fortress and Liturgy Training Publications all produce excellent inexpensive booklets. Or, have kids write their own prayers (if given some pointers/themes). What about taking the Lenten disciplines of prayer, fasting, and alms-giving as topics for prayer.

  • By Tonya: We just made Anglican prayer beads and I made up a handout to give the kids in my classes.

Prayer Pillows

Using T-Shirts

  • By JRzmom: My idea isn't original, and I would be happy to give credit if I could track down the source. We are using prayer pillows as an art project for the children. The pillows are made of infant or children's (size small) t-shirts. Adult volunteers sew the bottom and sides closed on the shirts, including where the sleeve meets the body of the shirt, leaving the neckline open and slipping a piece of cardboard inside to keep the permanent markers from going through. The children choose a prayer or scripture to put on the shirt and then decorate it to their liking with fabric markers. They then remove the cardboard, stuff the pillows and the older children or adult helpers can slip stitch the neck opening closed. T-shirts with pockets would cost a little more, but the pockets can hold prayer cards or small prayer notebooks for the children.

Using Fleece - no sewing required!

  • By JCarey: Use fleece to create wonderful pillows with no sewing. The older kids would cut and tie knots, the younger kids would just knot and the youngest could stuff the pillow. Maybe some adults in the church could make the pillows and let the kids decorate with fringe and beads or use paint to place a design on them. I can see the older children saying a prayer for each knot that they make. You would have to sew or iron on with fabric tape a pocket.

Thrift Store Pillowcases & Fabric Markers

  • By Scurlock, AR: In my SS class, I used old pillowcases that I got free from our local thrift store. Before class, I made a template of a large lion paw print (which also happens to be our school mascot). The children traced two or three paw prints anywhere on their cases. Then they took fabric markers and wrote a prayer in each paw print. They chose a good morning, a good night, and the other prayer was whatever they wanted it to be about. (Most chose to write a prayer about world peace.) By using markers instead of paint, the children can take the cases home that day! I do believe they have enjoyed this activity more than any other one we have done. I got this idea from www.christiancrafters.com. This is an absolutely wonderful site to use for SS. I hope this works as well for you all as it did for me!!

Moderator Notes:  Anyone who has made a prayer pillowcase - have said it worked great!


Creating a Prayer Booklet

  • By Hilary: Our kids just made prayer booklets using inexpensive dollar store photo albums. The clear pages allow you to easily change the page as you update prayer requests! One of our clergy uses this method for keeping track of his intercessory prayer list. He has an "emergency" list, one for every day of the week eg. Monday: missionaries, friends abroad, Tuesday: all pastors... (you get the idea).

  • By keywestkel (Kelly):  We are creating Lord's prayer books. I have broken the prayer down so that each child adds a page to their Lord's prayer book (on page 1 - "Our Father," on page 2 - "who art in heaven," etc.) I printed labels on the computer with the prayer sentences for the younger kids; older kids can write the portion of the prayer. Then kids illustrate what this portion of the prayer means to them.

Last edited by Luanne Payne

The Lord's Prayer

Art Workshop


Summary of Lesson Activities: 

Creating Lord's Prayer Posters for display among the congregation or use in worship.


Supplies:

  • 3 & 4 years: 10 sheets parchment paper (resume paper), glitter, stickers, markers, crayons, papers of the Lord’s Prayer for them to glue on (or printed directly on)
  • K & 1st Grade: scrolls, dowels, big paper, fancy letter stencils, skinny markers, markers, crayons, the words of the Lord’s prayer written on the scrolled paper.
  • 2 & 3rd Grades: Big paper or cloth (1/2 a twin sheet works quite well), markers, yardstick to make lines straight, pencils, way to hang the banner.
  • 4 & 5th Grades: Big paper or cloth (1/2 a twin sheet works quite well), markers, yardstick to make lines straight, pencils, way to hang the banner 

Preparation:

  • Read the passage you are teaching from—be familiar with the Lord’s Prayer
  • Gather materials for class project


Presentation


Opening-Welcome and Lesson Introduction:

Greet the children and introduce yourself.


Open with a prayer.


Dig-Main Content and Reflection:


Class for 3 & 4 years:

  1. Play a game or do a quick activity to prep the kids for the lesson and to get to know names. For example, have everyone go around and say their name and favorite color. The next person must then tell their name and favorite color and the person’s next to them.
  2. Read to them the Lord’s Prayer and explain that this was the prayer that Jesus used to teach others to pray.
  3. Tell them that “Our Father” refers to God. “Who art in Heaven” refers to where God is sometimes to watch over us.
  4. Help them to learn the first line of the Lord’s Prayer.
  5. Decorate the papers that have the Lord’s Prayer printed on it.
  6. At the end, say together the first few lines of the Lord’s Prayer. End with “Amen.”


Class for K & 1st Grade:

  1. Play a game or do a quick activity to prep the kids for the lesson and to get to know names. For example, have everyone go around and say their name and favorite color. The next person must then tell their name and favorite color and the person’s next to them.
  2. Explain that this was the prayer that Jesus used to teach others to pray.
  3. Some of the 1st graders will want to read. As they read, stop after each line or two and talk about what symbols they could use to illustrate the prayer.
  4. Give the kids the scrolls with the words printed on the paper. Have them decorate the scrolls with the pictures which symbolize for them the words. Especially the younger kids may need help figuring out the words and what pictures go where. Remember, though, there is no right/wrong answer!
  5. “Read” the Lord’s Prayer together.
  6. Close with a rousing “Amen.”


Class for 2 & 3 and 4 & 5:

  1. Play a game or do a quick activity to prep the kids for the lesson and to get to know names. For example, have everyone go around and say their name and favorite color. The next person must then tell their name and favorite color and the person’s next to them.
  2. Last week, the kids wrote a new version of the Lord’s Prayer. You should have that from the “In My Own Words . . . “ teacher. Have the kids talk about why they chose the words they did, and what they mean to them. Have them explain them to the kids who weren’t there. Revisions can be made—as long as people’s feelings aren’t hurt.
  3. You may want to have the poster board lightly lined beforehand so the kids can put on the letters. You will want to emphasize that this project will be shown in front of the church (at coffee hour) and should reflect good work, not sloppiness. Find a person with neat writing to line it out, and then someone else can go over the pencil with a marker.
  4. Add decorations, whether glued on or drawn on.
  5. Have the kids help clean up.
  6. Close by reading the “new” Lord’s Prayer.

These could be used in WORSHIP.

If your service uses a projector, photograph the posters and project them during the service where the congregation recites the prayer.


A lesson originally posted by member Janet Chisolm


A representative of Rotation.org reformatted this post to improve readability.


Last edited by Rotation.org Lesson Forma-teer

Lord's Prayer Banners or Prayer "Wall"

The following idea was suggested in a brainstorming session some years ago. The idea is to create four different "display boards" or banners on which are displayed either key words/parts of the Lord's Prayer, -OR- the four-word that make up the acronym: A-C-T-S: Adoration, Confession, Thanksgiving, Supplication --with examples on each panel/board of those types of prayers and prayer words. These boards are then displayed where people can attach their own prayers to them.

A.C.T.S. Prayer for Kids

Depending on time and other variables, these could be created in one class time by four different groups working independently, or one per week by a different class, or the same class.

Other than teaching 'about the Lord's Prayer" and "About Prayer using the A.C.T.S.  breakdown of "what goes into a prayer, the banner or wall display is intended to be interactive with the congregation by placing it in a prominent location and inviting adults to post "post it note prayers" (or staple index cards) on the display board that the students have created. In this way the Prayer Wall collects prayers and shares what people are praying about or asking for prayers for.

The panels can be made out of 2' x 4' sheets of drywall. Drywall is easy to cut* to size, paint on with acrylic paints, quick to dry, and easy to pin notes to.  You can use colored duct tape to frame the border of the drywall.

Tip: PRIME the drywall with white primer before having the kids paint it.

To stand the drywall upright, have a handyperson ATTACH 1x3 board to the BACK of the drywall panels (to provide rigidity) which will allow them to be leaned against a wall. A "very" handyperson could make blocks to keep them from moving.

BANNER OPTION:

You can also create four different "banners" using white or beige muslin cloth, edges sewed or tacked, with a loop at the top for a dowel rod so you can hang them afterward.


The Four Panels:


A – Adoration – praise to God – God is awesome, Holy is your name. (Hallowed be Thy name).

Ideas for panel:  Creatively painted or collaged "Names of God."


C – Confession – confess what we did wrong, tell what we’re sorry for (Forgive us our trespasses, as we forgive our trespassers).

Ideas for panel:  Creatively painted or collaged 'starter phrases' such as, "I should have..." and "I need to remember to..." and "I need to stop...."

• T – Thanksgiving – give thanks to God, grateful for God’s blessings (thank you for this beautiful day).

Ideas for panel:  Creatively painted or collaged pictures of people and things kids are grateful for.

S – Supplication – or asking – asking for help for yourself or others, asking for what we need, (Give us this day our daily bread).

Ideas for panel:  Creatively painted phrases, such as: "I need..."  "Give this person...."  "Keep an eye on ...."  "In my school/work we need..."


For the bulletin: You are invited to come to our prayer wall in the narthex. Stop & pray with the prayers already hanging there. We encourage you to write your own prayer & tack it to the wall, also. Rotation Sunday School.

Suggestion: Pass out Post it Notes during prayer-time in Worship. Have members post their prayers as they leave worship, or collect them and post them for them.


Ideas from a discussion between Rotation.org members Rachel H and Neil M, with ideas from others as well.

Attachments

Images (2)
  • ACTS Prayer
  • Prayer Post Its
Last edited by Neil MacQueen

Illustrating Phrases from the Lord's Prayer
Creating Lord's Prayer Banners

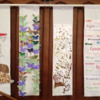
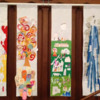
The BreakingNewBread.wordpress.com blog has a post titled, "A Visual Lord's Prayer" with the following images on it showing how they illustrated phrases from the Lord's Prayer.  That post was inspirted by a list of phrases from the Lord's Prayer shared at the popular Children's ministry blog: worshipingwithchildren.blogspot.com/2014/08/year-propers-17-26-lords-prayer.html

These are collage banners created by the teacher using artwork created by her students in Sunday School. She also did a series of children's sermons in which she gave children various items that represented the "phrase of the week" as she worked through the Prayer. See those notes on her blog.

visualLordsPrayer2

Attachments

Images (2)
  • visualLordsPrayer2
  • visualLordsPrayer1
Last edited by Neil MacQueen

Is there anyway to get more information of on how to use watercolors on drywall for the panels referred to above?

HI Margaret,
It was an idea suggested long ago and I've just updated the post to make it more helpful.

We did something similar in our church many years ago, but we didn't use drywall. Instead, we used 2x4 plywood sheets we had left over in our church garage. We painted them white to prepare them, and then used acrylic art paints on three "subject" panels titled, "Thank, Ask, Promise."

Regarding the "watercolor on drywall" suggestion, I wouldn't do that. Instead, I'd use acrylic paints (kids paints).

Aside: I always wanted to paint illustrations and write prayers/prayer prompts on mirrors for a display that kids could walk up to and see themselves in the prayer, "Surrounded by God's Love, offer a prayer of thanks."  etc.

I see now that they make flexible acrylic mirror tiles you can stick on things.

Attachments

Images (1)
  • mceclip0
Last edited by Luanne Payne

Add Reply

Post a New Topic
Lesson or Resource
Rotation.org Inc. is a volunteer-run, 100% member supported, 501(c)3 non-profit Sunday School lesson ministry. You are welcome to borrow and adapt content for non-commercial teaching purposes --as long as both the site and author are referenced. Rotation.org Inc reserves the right to manage, move, condense, delete, and otherwise improve all content posted to the site. Read our Terms of Service. Get a free Registered Membership or become a Supporting Member for full access to all site resources.
Rotation.org is rated 5 stars on Google based on 51 reviews. Serving a global community including the United States, Canada, United Kingdom, Australia, New Zealand, S. Africa, and more!
×
×
×
×
Link copied to your clipboard.
×
×