Art Lessons, Ideas, Activities, and Resources for Teaching "Jesus' Birth Through the Eyes of the Wise Men" in Sunday School.

Post your Sunday School ART lessons, ideas, activities, and resources for "Jesus' Birth Through the Eyes of the Wise Men, Magi" here.

Magi.creative.Sunday.school.lessonsIn addition to checking out all of our public lesson ideas, don't miss the Rotation.org Writing Team's Magi lesson set ~  Among many wonderfully creative lessons, it includes a detailed art sculpture lesson plan where students learn the "hidden" meaning of Matthew 2:11's familiar words, "they bowed down and worshiped him."


An Art Idea about The Wise Men's Gifts

Activity: Make scented sachet packets. Two of the gifts smelled good (frankincense and myrrh). They remind us that Jesus was "pleased to dwell" in this baby, and that we too are to lead lives that are pleasing --smell good to God (figuratively speaking), and that we are the "aroma" of Christ (2 Corinthians 2:15).

See more ideas about the gifts in this topic.

Materials List:

  • cloth rectangles, approx 6 x 12 inches in size
  • pinking shears
  • 18 inch lengths of ribbon, yarn with metallic fibre or multicolour yarn (something to tie up a package fit for a king!)
  • cinnamon sticks and whole cloves for your scents
  • Large-eyed needles
  • Embroidery thread
  • Optional: embellishments to sew or glue on: sequins, lace, ribbon and tacky glue
  • Or, if time is short, use a hot melt glue gun

Directions:.
Have the kids select a length of cloth, and pink the edges if they wish. Fold strips in half long-ways to form a small rectangular bag. Sew together with a running stitch or Glue gun the 2 pinked edges. Leave the top open. Put a dozen cloves and 2 or 3 cinnamon sticks in each bag. (If you break up the sticks, the scent is stronger.) Tie the yarn or ribbon around the neck of the bag about 1 inch from the top.

Kids can further embellish by gluing on sequins, lace, more ribbon, etc.

Here is a great tutorial on teaching children to sew lavender bags from Red Ted Art.

Attachments

Images (2)
  • Magi.creative.Sunday.school.lessons
  • Matthew2-Magi-Wisemen-Lessons
Last edited by Neil MacQueen
Original Post

Replies sorted oldest to newest

Wisemen Art Idea: "Star Wands"

A sample Star WandOne year we made star wands. We cut star shapes out of gold poster board and punched holes near the tips. Kids threaded ribbon through jingle bells and tied one ribbon to the tip of each star. Ahead of time, I had someone put a slit at the top of a wooden dowel and we glued the star into the dowel. We each made one and then made extras for the congregation. During worship, we waved our wands during the hymn, We Three Kings.

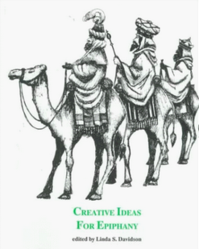
Another activity that I have used is Epiphany Bells. It tells the story of the Wisemen using differentBook - Creative Ideas for Ephiphany sounding bells.

It can be found in the book Creative Ideas for Epiphany, edited by Linda Davidson, published by Educational Ministries, Inc. (ISBN-10: 1877871249)  Note: Now OUT OF PRINT, however, used copies are available.

Ellen Barnhart
UCC Ames

Attachments

Images (2)
  • Star Wand
  • Book - Creative Ideas for Ephiphany
Last edited by CreativeCarol

Epiphany Craft Ideas

Suzanne had asked the question:
Does anyone have some good Epiphany Crafts? I am very appreciative to any suggestions.


Dana offered several suggestions:

  1. Can candle holders: freeze water in a small can and when frozen use a hammer and nail to punch a star or crown design into the can. When the ice melts, put a small tea candle in the can.
  2. Star streamers: 2 construction paper stars, crepe paper streamers, a dowel rod, glue, tape or stapler to fasten together. Put a streamer or two on each point of the star, glue two stars together leaving a small opening at the bottom and put the dowel into the opening. Then fasten star to the dowel.
  3. Suger star cookies with a hole in the top before baking. Decorate and put yarn/ribbon in the hole and hang.
  4. Apple Star Print - Cut an apple in half either cross-ways or stem to stem. You will see a star. Fill small bowls with tempra paint and press apple halves into paint and then press firmly onto paper or fabric.
  5. Glitter stars - on wax paper outline a star with a thin line of white craft glue. Sprinkle glitter on the glue - cover completely. Shake off excess glitter. NOTE that with this project it takes time for the glue to completely dry, but when the glue is dry you can carefully peal the wax paper off and you can hang your star.


MMB offered suggestions:

  1. "Epiphany Light of the World" candles - decorate glass candle holders any way you like. (My favorite is to decoupage tissue stars onto clear votive holders.) Have families light a candle in their home every night from Jan. 6 until Ash Wednesday to serve as a reminder that Christ is the Light of the world and is present with us.
  2. Worship Idea Using Chalk: Blessing the Chalk/Blessing the Home.
    One tradition for Epiphany is to bless homes and inscribe in chalk 20+C+M+B+XX (The x's being the year.) It stands for Christus Mansionem Benedicat: May Christ Bless This House. Talk about ways we can bless those who come through our doors, and send kids home with chalk and a prayer to bless their own doorways with their families.
Last edited by Amy Crane

Jesus' Birth through the Eyes of the Wise Men

Candle Art Workshop--The Magi

candle.for.WiseMen.lesson.craftSummary of Lesson Activity:

Make wax chunk candles as we learn about how Jesus is the Light of the World.

Scripture Reference:

Matthew 2:1-18

Memory Verse:

“The people walking in darkness have seen a great light; on those living in the land of the shadow of death a light has dawned.” --Isaiah 9:2

Lesson Objectives:

The Children will

  • Realize that Jesus is not only a “light to the world”, but that He is also a light showing them the way in the dark times of their lives.
  • Understand that God’s people may be very different from each other, but we have our faith in Jesus in common.

Leader Preparation:

  • Review Bible Background notes and scripture
  • Gather the materials

Materials List:

  • Bibles
  • Candle and match
  • Candle molds (one for each student): we suggest plastic coated drinking cups (like Dixie cups) but you could also use plastic yogurt cups, juice concentrate cans, school lunch milk cartons, paper cups
  • Awl to punch holes in molds
  • Pam cooking spray if mold is not plastic or wax coated
  • Wax chunks in various colors (see advance prep)
  • Clear candle wax--various retailers offer wax slabs, small wax blocks, or wax flakes
  • Crock pot with plastic liner
  • Boiling bags for candle wax or quart size plastic containers (to melt wax in)--you could also use a metal bowl or glass measuring cup to hold the wax
  • Spoon to stir the wax
  • Pot holders or oven mitt
  • Wicks
  • Modeling clay to seal the wicks
  • Large tray with wax paper to protect the table when pouring the candles
  • Small plastic bags to put the finished candles in
  • Note about candle safety to go in each bag
  • Masking tape to label each candle with student name
  • Scissors
  • Paper and pencils or pens for journaling

I am going to give some general information on how to go about creating your candles. I am also suggesting several websites for you to refer to as you come up with the best method for your class. This web site has a lot of general information on making candles, as well as information on making the wax chunk candles. This website and this website offer some tutorials on using crockpots to melt the wax.  Or you may have your own favorite hobby websites to refer to!


Advance Preparation Requirements:

  • Make your own candle using your preferred technique; note how long it takes the wax to melt so that you know how much time you will need before class.
  • Punch holes in bottom of molds with an awl
  • You may want to put the wicks in the molds for the younger classes before class starts
  • Prepare wax chunks in various colors. Here are several options for doing so:
    • Buy pre-made wax chunks in several colors.
    • Break up (or cut) existing candles into various sized chunks.
    • Create your own wax chunks. The above mentioned tutorial on chunk candles talks about making your own chunks.

Preparations on the Day of Class:

  • Cover large tray with wax paper.
  • Get supplies ready to melt the clear wax. The options mentioned in the tutorials include melting the wax on the stovetop using a double boiler technique, or using a crockpot. 
    • Once you have started the melting process, do not let the children near this area. Do not leave the melting wax process unattended.
    • Stir the wax occasionally as it melts. Once it is melted, turn off the heat source so that the wax does not overheat (remember--wax is flammable).
    • Use hot pads if you are picking up a metal or glass container holding the melted wax.

Important Safety Tips!

  • Know where the nearest fire extinguisher is in the building (you can’t be too safe)--wax can be flammable and should be treated like a grease fire--with a chemical extinguisher--and not with water. You might want to have the extinguisher in the classroom.
  • Once you have started melting the wax, do not leave it unattended.


Presentation

Opening- Welcome and Lesson Introduction

Greet the children and introduce yourself and any helpers that you have. Open with a prayer.

Dig- Main Content and Reflection

Bible Story:

DO: [Have all the lights turned off in the room; have your candle and match ready to use].

ASK: Let’s pretend this room is really dark, so you can’t see anything. What would happen if I asked you to go over to that cabinet and get something for me? (Possible answers: not able to find your way there, bump into things and hurt self).
What would help you to walk through the room and find the item for me? (Possible answer: light of some sort).

DO: [Go ahead and light the candle].

SAY: You can see that the light is more powerful than the darkness. There are all kinds of light, but Jesus is the most important light. We don’t call Him a light because He shines in the dark; we call Him a light because He shows us the way, just like a flashlight or this candle could. Jesus says in the book of John (8:12) that “I am the light of the world. Whoever follows me will never walk in darkness, but will have the light of life.”

When Jesus was just a baby, someone else called Him a light. There was an old man named Simeon, who was waiting for the Savior to be born. When Mary and Joseph brought Jesus to the temple, Simeon saw Him and took Him in his arms and said: “My eyes have seen your salvation, which you have prepared in the sight of all people, a light for revelation to the Gentiles” (Luke 2: 31-32).

A light for the Gentiles—does anyone know what a Gentile is? (Someone who is not Jewish, who is not from Israel). In our story this month, we are learning about the very first Gentiles who came to worship Jesus. Jesus came to be the Savior of both the Jews and the Gentiles. Most of us in this room are probably Gentiles.

DO: Find Matthew 2: 1-18 in the Bibles. Read—or have the class read—the story. You could also have them tell you the story in the later weeks of the month.

Ask a few questions after the Bible story: Were the magi from the same country as Jesus and His family? (No)
What did they do when they saw Jesus? (bowed down and worshipped Him, gave Him gifts)
Did Jesus come to be the Savior just of the people who lived in the country of Israel or did he come for people all over the world?

Activities:

SAY: We are going to make candles to help us remember that Jesus is a light to the world.

Set out the containers filled with the wax chunks of various colors.

Each child should have the following: candle mold (with hole already punched in bottom), length of wick, pencil, small piece of clay. Have them thread the wick through the hole in the container and gently pull the wick tight. Have them use a small piece of clay to hold the wick in place on the outside bottom of the mold and to seal the small hole. You or the guides should then spray each mold with a little Pam (if you think it is necessary with the molds you are using).

Instruct the children to fill their candle mold with the chunks of colored wax—they can use whatever colors they want and in whatever order (for example they could layer different colors or just mix them randomly). They should hold the wick in place in the center as they put the wax chunks in. They can fill the mold about ¾ full.

As they are doing this, ask them the following questions:

  • What do you notice about the wax pieces—are they all the same? (different colors, different sizes).
  • What do these wax pieces remind you about the family of God? (filled with all sorts of people, people who are different from each other).
  • What are some of the ways that God’s people differ from each other? (different countries, different talents, men & women, adults & children, etc.).
  • What do we all have in common? (Jesus is our Savior)

Have them take a piece of masking tape with their name on it and place it on their mold. Tell them you will be pouring the hot melted wax into the molds to finish the candles. It may take a while to cool, so they will get their candles next week. Collect the candles and put them on the tray. Pour melted wax into each mold. If there is any wax left over, you can let it harden in the bag and use it again next week.

After class: When the candles have started to harden, you can move the tray of candles to a safe spot for the week. Once they are completely cooled and hardened, you can remove them from the molds. Take the masking tape with the student’s name and put it on a plastic bag. Put the candle in the bag along with the candle safety label. They can be handed out the next week.

Reflect:

Let’s review the memory verse: “The people walking in darkness have seen a great light; on those living in the land of the shadow of death a light has dawned.” --Isaiah 9:2

Without Jesus, we are in the darkness. We are in the darkness of sin and death. But Jesus is the light—He lights our way to heaven and He shows us the way to live here on earth. He can help all people see God’s love and forgiveness. We’re going to think a little bit more about darkness and light with our journal questions.

Journaling (last 5 minutes of class):
Help the guide to hand out pencils/pens and the student folders. Place the sticker with the journaling topic on a blank page. The children should find a place to sit quietly and think and write in their journals. You and the guide may need to help the younger children with their writing. Another option for younger children is to draw a picture about the topic.

Journal Topic: Think of a time when things seemed “dark” and upsetting. How was Jesus a light in that situation?

Closing

Have the children help with the cleanup and then close with a prayer.

Closing Prayer: Dear Jesus. Thank you for coming for all people. Thank you for coming to be my Savior. Please light the way and show me the way that you want me to live. Amen.


Additional Suggestions - Age Adaptations

Younger students
They should know that the story is from Matthew, but they don’t need to know the chapter and verse references of the other passages in the discussion. Grades 1 & 2 may need more help preparing their mold—or you could prepare their molds ahead of time.

Older students
If there is time, talk a little bit more about the “dark” times of their lives—why was that time upsetting, how could or did Jesus help them in that situation.


EDITOR'S NOTE:
The following alternative approach was posted by member "Mabethea" on January 2005:

We did this but used gel candle kits from Oriental Trading item #48/20170 $29.95 for a kit that makes 12 everything included (tubes of gel, colored wax chunks, wicks, glass containers)...and NO heat involved at all.


Editor's Note: After posting this lesson, Cathy Walz updated it with these field-test notes:

We just finished this rotation in January and I wanted to add a few notes.

  • We used the plastic-coated Dixie Cups as molds and these worked great--you could just tear the paper away when the candle was set.
  • We discovered that we could send the candles home with the students that day--the candles set up enough by the end of class. You could hurry that process along a little by putting them in a pan of ice (or snow--depending on your location ).

The kids loved this project. Even the 5th and 6th grade boys couldn't wait to get home  to light their candles!
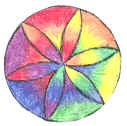
In talking with some of the students, they also seemed to "get" the concept that Jesus is the light of the world and came for all kinds of people (all kinds of people = different colored chunks in the candle).


A lesson written by Cathy Walz

A representative of Rotation.org reformatted this post to improve readability.

Attachments

Images (1)
  • candle.for.WiseMen.lesson.craft
Last edited by Amy Crane

Jesus' Birth through the Eyes of the Wise Men

Potpourri Scent Bags Art Workshop
We call our Art Workshop: "My Father’s Workshop"


Summary of Lesson Activity:

Make potpourri bags as reminders of the good gifts the wise men brought to Jesus.

Scripture Reference:

Matthew 2:1-12

Memory Verse:

“Those who are wise shall shine like the brightness of the sky, and those who lead many to righteousness, like the stars forever and ever." Daniel 12:3


Leader Preparations:

  • Read the scripture for this lesson.
  • Prepare one of the “Good Scents” projects at home and bring in to show.
  • Gather the following materials:
    • Bibles
    • Fabric netting
    • Scissors
    • Cotton balls
    • Frankincense & myrrh oils
    • Ribbon for tying
    • Wide gold ribbon
    • Baby wipes
  • On the day of class:
    • Have each kid’s station ready to go with materials.
    • Perhaps for younger students, pre-cut the netting fabric.


Lesson Plan


Opening- Welcome and Lesson Introduction

Greet the children and introduce yourself.
Have a short prayer to ask God to be with us as we learn more about his word and how we can follow him.

Dig- Main Content and Reflection

Open with discussion (answers to questions are in parenthesis).

  • Does anyone know the names of the Wisemen? (Balthasar, Melchior, and Gaspar) *
  • What three gifts did they bring to Jesus? (Gold, Frankincense, and Myrrh)
  • What three gifts would you like to receive today? (any answer is fine)
  • What three gifts would you like to give to Jesus today? (offer help)
  • Discuss ways in which we can be The Wisemen of today by seeking out Jesus today…(praying for others, treating people nice, behaving for parents, attending Sunday School, etc.)


Art Project: ”Good Scents” potpourri bags as reminders of the gifts The Wisemen brought to Jesus.

Cut fabric netting into 4-inch squares. Put a few drops of frankincense oil on three cotton balls. Do the same with the myrrh oil. Put the three cotton balls into the center of the square netting. Pull up the corners and tie them with thin strips of ribbon to make a little bag. Have each child make two of each kind of scent. Staple the four bags to a wide strip of gold ribbon.

Tell the kids to hang their potpourri bags in their closets to remind them of something they can do for Jesus. (Or perhaps give them away as a gift to someone.)

Closing

Have the children assist in the cleanup and close with a prayer.


Reference:
Good Scents idea found in Abington’s Bible Zone “Jesus Son of God” Book, 1997.

A lesson written by Liz Weingart from Canfield Presbyterian Church, Canfield, OH


* Editor's Note: Margie at Forest Hill United Church pointed out that the initial discussion questions could be misleading to children. She noted: "There is no biblical reference to either the number or names of the Magi. These are traditions that have developed from the three gifts and our need to name." See below for her suggested adaptation.

Last edited by Amy Crane

Salt dough ornament stars

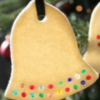
make the ornaments in advance; here is a blog with instructions and pictures showing the steps  http://frugalfemmecarole.blogs...now-let-it-snow.html

During class the kids can paint and glitter the ornaments while you talk about the story after reading the scripture.  The picture from the blog is snowflakes, but stars could be done in a similar manner:

Frugal.Femme.snowflake.ornaments

These are the Williams Sonoma pie crust cutters that she used. (I think they look sort of like stars)  

WilliamsSonoma.cookie.cutters.forWisemen.ornaments


But Williams Sonoma also has a set with a star. (The presses that leave the dents make them more interesting to paint than plain flat cookies.)

star.shaped.cookie.cutter

Attachments

Images (3)
  • Frugal.Femme.snowflake.ornaments
  • WilliamsSonoma.cookie.cutters.forWisemen.ornaments
  • star.shaped.cookie.cutter
Last edited by Amy Crane

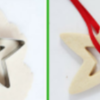
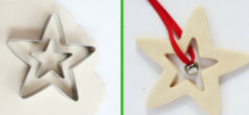
Oooh, Amy... lots of good ideas on this one! You could just use a regular star cookie cutter and then use a knife to cut the pattern (as shown in the photo above in your post.) Or use a smaller star cookie cutter to remove the middle (left hand picture below) or just make an impression in the middle (to add interest to your stars). Or add glass beads instead of paint (right hand photo). Obviously, the glass beads as shown would be too small to use with young children. And, don't use plastic beads as they'll melt in the oven!

star cut out    glass beads

Left photo from The Best Ideas for Kids
Right photo from The Artful Parent

Attachments

Images (2)
  • star cut out
  • glass beads
Last edited by CreativeCarol

The Magi Star Coupon Art Workshop


Summary of Lesson Activities:

Children will each make a set of star-shaped coupons as a gift for someone in their family.
Note: This activity is appropriate regardless of the fact that it may be done after Christmas is over! Gifts are always a good thing.

Scripture Reference:

Matthew 2:1-12


Leader Preparation:

  • Read the scripture for this lesson.  sample-coupon
  • Read the background materials.
  • Create a large, rectangular gift "coupon."
  • Decide how you will attach together the stars -- using staplers, or paper punches with brads, or tied with yarn, or placed on a snap-closure binder ring.
  • Print out a picture of the wise men which includes a bright star, such as one of these, or use a picture in a Bible storybook.
  • Gather the following:
    • Stars - precut from a heavier paper (not construction paper); 5 -10 per child, depending on the age of the students
    • For younger students create a "last page" star (**See lesson notes below**). Also, gather glue sticks.
    • Pens - one per student (for younger students: may need to have extra hands available to write gift ideas on the stars)
    • Markers or colored pencils or gel pens (optional)
    • Stickers (optional)
    • Supplies needed to attach the stars together (staplers, brads, yarn, etc.) If you are using a hole punch, pre-punch each star before class.
    • Envelopes - one per student - to fit the created stars


Lesson Plan


Opening:

Do:  Greet the children and introduce yourself and any helpers that you have.
Show them the picture of the wisemen following a star.
Find out what your students already know about the Bible story of the wisemen (also called "Kings" or "Magi.")

Ask: These wisemen traveled a long way to see Jesus. How did they know where to find Jesus? (if necessary show them the picture again)

Say: That's correct; they followed a star! Today our lesson will focus on the wisemen who followed a special star to find Jesus. Because these wisemen brought Jesus gifts, we’ll be working with some paper stars to create a special gift for someone in your family. First, let's read our story.

Ask:  If we want to read a story about Jesus, where would we find it – in the Old Testament or the New Testament of the Bible? (in the New Testament)
What are the names of the first four books of the New Testament? (Matthew, Mark, Luke, John)
Say: We find the story of the wisemen only in the Gospel of Matthew.

Do:  Read the Bible story in Matthew 2:1-12.

Note:  If this is a week early in the Rotation, read the scripture together. Towards the end of the Rotation, ask the students if they can tell you the story. Use the Bible to fill in any missing details.

Dig:

Ask: I wonder what you learned about the wisemen story, that you didn’t know before? (accept any replies)

Say: Listen carefully to this verse of our story. Let's listen to hear the gifts the wisemen brought Jesus.
Do: Re-read verse 11. ("On coming to the house, they saw the child with his mother Mary, and they bowed down and worshiped him. Then they opened their treasures and presented him with gifts of gold, frankincense, and myrrh.")

Ask:  Gold would be a practical gift; that would be like giving money, but who can tell me what frankincense and myrrh are? (allow any responses)
Say:  Frankincense is a tree sap that was burned to enjoy its sweet smell. Myrrh is also a scented tree sap.

For older students:
Do:  Share that Frankincense was used in the Temple; it was burned to honor God, Myrrh was used to prepare a body for burial.


Ask: Frankincense and myrrh... I wonder if you've ever given such gifts? (allow replies)

Say:  Frankincense and myrrh were important and useful gifts in the time of Jesus, but let's talk about a gift that we could bring to people important to us today.

Do: Show them the coupon you created.

Ask: To whom could you give a coupon like this, as a gift?
I wonder what you think of the idea of giving a gift of your time and your energy?

Say: The wisemen brought special gifts to Jesus. To remember this story, we'll create a special gift of coupons to give to one person in particular; someone in your family. We will write several coupons. Let's write each coupon on a star!

Make coupon ‘stars’

  1. Have each child decide who will receive their gift of coupon stars.
  2. Distribute supplies to those who have decided who will be the recipient of their gift.
  3. Have them decide gifts to give and write each gift on a star. (For younger students, you may need to help them with the writing.)
  4. Continue until they have filled out several stars.
  5. Make a cover page/star (“My gifts to you” - with the receiver’s name).
  6. Make an ‘ending’ page with these words (or something similar): “No matter what the gift is... Jesus is the best gift of all."
    (**May wish to preprint these words for younger students. Leave room for the students to sign their name. Cut into an appropriate size, and provide glue sticks to glue them on to the last star page.)
  7. They may then decorate the stars with markers, stickers, etc. (optional)
  8. Attach together the stars.
  9. Place the completed, attached stars in an envelope, and write the recipient's name on it.

Close with a prayer.

Send children home with their envelope of gift stars.


A lesson written by Carol Hulbert for Rotation.org,
from an idea originally posted by Rachel Haugland from: Bethel Lutheran/Elim Lutheran Churches,  Iowa.

Attachments

Images (1)
  • sample-coupon
Last edited by Amy Crane

Just a comment on one of the discussion questions in the potpourri lesson above.  There is no biblical reference to either the number or names of the Magi.  These are traditions that have developed from the three gifts and our need to name.

We did a well-received lesson with our kids where we showed them lots of different artistic representations of the Magi's visit, comparing them with each other and the biblical text.  For older children it provides a good jumping-off point for a discussion about the assumptions we make about other people and how potentially hurtful this can be (bringing darkness instead of the light of Jesus).

Margie

Last edited by Amy Crane

Hi Margie,

Thanks for your very correct comment about the names of the wise men being traditional! (I have made note of this in the actual lesson above.)

Would it be possible for you to share your lesson? (If it is not from a copyright curriculum.) Sharing the source of the art you found, would also be helpful.

A good place to search for artwork for Bible passages is the Vanderbilt University Divinity Library's Art in the Christian Tradition database. Here is a link to the search results for the Matthew 2:1-12 passage, which includes a variety of interpretations and art styles.

Thanks,
-- Carol

Last edited by Amy Crane

Coincidence or providence

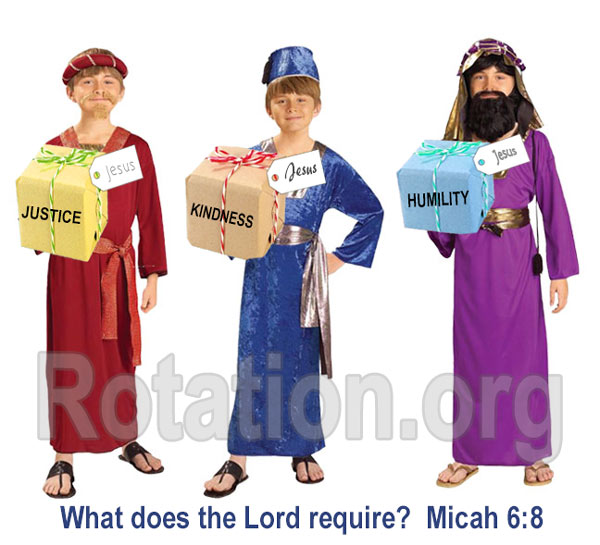
  1. The Magi bring three gifts
  2. Micah 6:8 describes three gifts that God wants: justice, kindness, and humility
  3. Gold, Frankincense and Myrrh can symbolize justice, kindness, and humility!

    Micah.6.8-Rotation.org

Gold = Justice when it is shared and used to heal others, not hoarded. See Jesus' comments about bigger barns in Luke 12:15-21 and Luke 15 where the Good Samaritan uses his wealth to heal.

Frankincense = Kindness and Pleasing.  Frankincense is an aromatic sap that if used to make things smell good, including offerings to God. I don't know about you but smelling good (or at least clean) is a kindness. Kind acts are small graces that make people feel good about themselves, valued, appreciated.

Myrhh = Humility and Healing.  Myrhh is a fragrant oil and healing ointment. When you put it on someone, it's an act of humility and healing. Just ask the woman who put it on Jesus' feet, and the other woman who put it on his hair. When we honor another, we are humbling ourselves -- and that too is an act of healing, especially in relationships. It was also applied to a deceased loved one's body before burial as a last act of honor (see the ointment the women were carrying to the tomb).

As an art project, it could be the creation of "gifts" with illustrations on the "wrapping paper" that describe the three gifts and connect it to Micah 6:8 via "What Does Baby Jesus Want for His Birthday?"

These three Magi could also bring these gifts to the baby Jesus in a pageant.

*Member Neil MacQueen, the original poster of this idea, wrote: I don't think Matthew had Micah 6:8 in mind when he told the story of the Magi's three gifts. I also don't think it's prophecy. It's just a great teaching opportunity that gives us another way to think about the Magi's gifts that doesn't follow the old "gold for kings" tradition.

Attachments

Images (1)
  • Micah.6.8-Rotation.org
Last edited by Neil MacQueen

The Wise Men Art plus Video Workshop Lesson Plan

Summary:epiphany_star_art_project

Children will learn about the visit of the wise men through discussion, examination of maps, watching clips from the feature-length film The Nativity Story, and by creating an Epiphany Star.

I posted my lesson plan in the miscellaneous category because it contains a variety of elements, but it contains an art project that can be done in an art workshop without watching the video.

Attachments

Images (1)
  • epiphany_star_art_project

Add Reply

Post a New Topic
Lesson or Resource
Rotation.org Inc. is a volunteer-run, 100% member supported, 501(c)3 non-profit Sunday School lesson ministry. You are welcome to borrow and adapt content for non-commercial teaching purposes --as long as both the site and author are referenced. Rotation.org Inc reserves the right to manage, move, condense, delete, and otherwise improve all content posted to the site. Read our Terms of Service. Get a free Registered Membership or become a Supporting Member for full access to all site resources.
Rotation.org is rated 5 stars on Google based on 51 reviews. Serving a global community including the United States, Canada, United Kingdom, Australia, New Zealand, S. Africa, and more!
×
×
×
×
Link copied to your clipboard.
×
×