In addition to these public lessons and ideas posted below, our Writing Team has been creating some terrific lesson sets for our supporting members that cover Holy Week stories. Here's the Team's link to the John 20 story of Mary Magdalene, Peter, and John meeting Jesus at the Empty Tomb.

Related Lesson Forums:
Road to Emmaus, Jesus eats breakfast, Feed My Sheep, Great Commission, Ascension

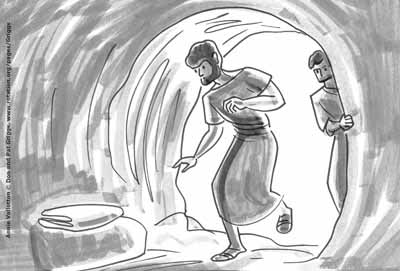
The illustration seen here is part of the Annie Vallotton Holy Week Collection at Rotation.org

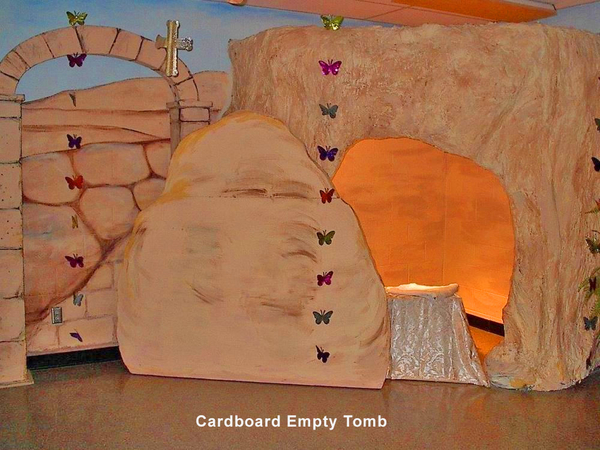
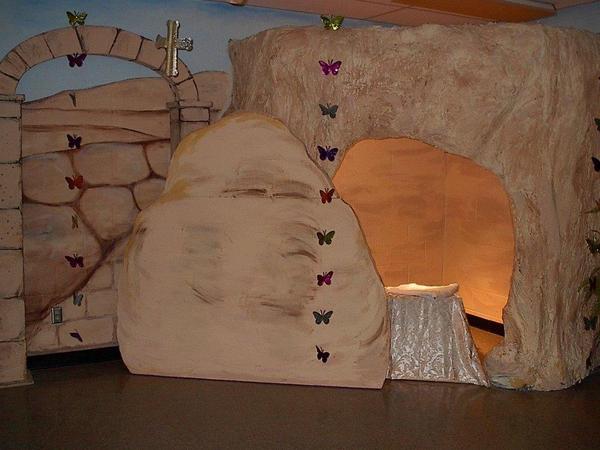
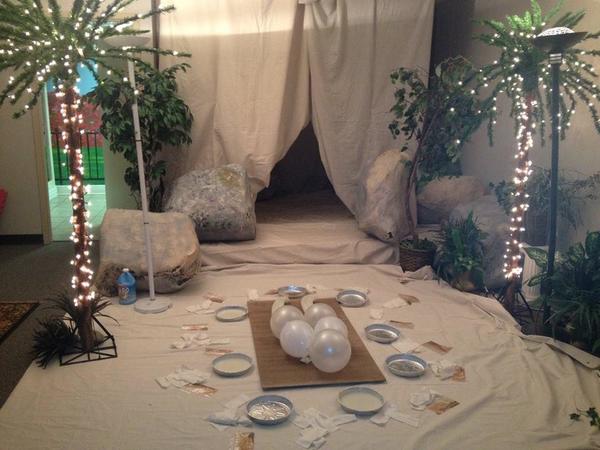
Here are ideas for building "The Empty Tomb" and other related scenery and props for Lent.

Energize your Sunday school lesson space by enriching your learning environment.

Last edited by CreativeCarol
Original Post

Replies sorted oldest to newest

A PIANO Box makes a large tomb.

Go to a piano store and ask them to save you a box! The boxes are large enough to fit serveral children in and are reinforced with a wooden frame on the inside. Ours is several years old, and still in good shape, except for the rock in front. Good luck.

Alternately, two refrigerator boxes taped together.

Last edited by Wormy the Helpful Admin Worm

You can see the FOAM tomb we built in Barrington in the PHOTOS page at https://www.rotation.org/topic/...church-of-barrington


A dad and his son built it out of old furniture foam glued to plywood, lightly spray painted. Durable yet relatively light.

The tomb was a triangular shaped fascade that fit into a corner and we used canvas to drape off the back of it to hide corner from the inside. The slight triangular shape made it fit nicely ACROSS a corner and stand on its own too.

The foam was "shaped and layered" for a more realistic rock look using razor blade knives and scissors.


We later used that tomb for Elijah's cave, stuck a tree in front of it and Moses on a ladder behind it to make it Mt Sinai, and laid it on its side to be rocks in various dramas.


ALTERNATELY:
You can paint a large reinforced Painter's PAPER drop cloths or canvas with shades of grey, and cut an entrance hole in it. Attach it to a wooden or pvc stand/frame. If using paper, add several rows of TAPE on the interior of the paper entrance to reinforce it against tearing.

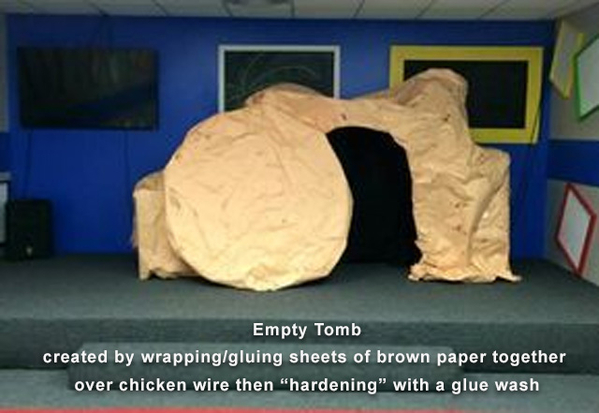
To give the paper or canvas some '3d dimension', attach some inexpensive chicken wire to the frame that you have bent outward so that the "rock" sticks out in various places. Make your rock covering the entrance out of cardboard or dense foam because it will take a beating.


<>< Neil

Last edited by Neil MacQueen
This is what we did last summer during VBS.

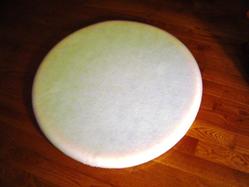
We used the "whale" previously made for Jonah. It is made by taping plastic sheeting together and attaching it to a box fan. We used a large ball covered in white newsprint for the stone.

We took turns wrapping a kid in a shroud of white sheets (not covering the face) and laying him or her in the tomb. Then everyone on the outside shouted "Alleluia! Christ is risen," as a cue for kids to try and unwrap themselves and exit the tomb. We had a stopwatch to see who had the best time.

Lisa

More ideas...

Posted by jenny

We did this for VBS one year. I made the tomb from brown paper sacks. Fill one with wadded up newspaper then slip another paper sack over that on to make a big block. Stack several up and tape them with duct tape. Kind of like an igloo.


Posted by <churchmom>

We had large pieces of foam core and corregated cardboard left over from a musical production; with some duct tape, we created a little "room" that we covered with burlap and sheets and draped with artifical ivy vines to make it look more "tomb-y." It worked really well, and was easy to disassemble.


Posted by dsevertson

I have made the 'tomb' with the children using paper mache. I make the form using chicken wire, making sure there are no sharp ends, and then have the children put the strips of newspaper soaked in the "goo" over the wire. When it dries it can be painted and decorated. This can be made to any size and you can make a large "stone" too!

Last edited by Luanne Payne

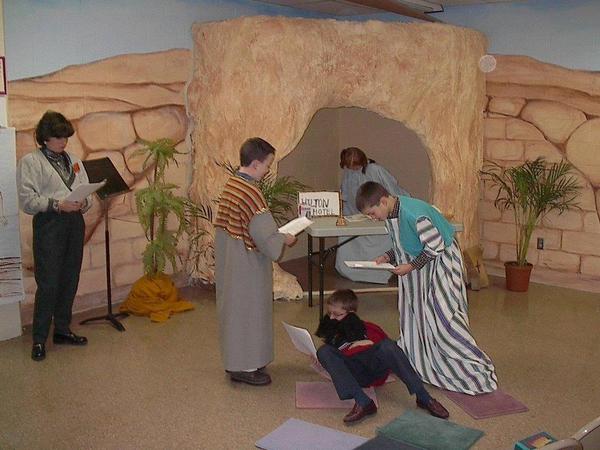
Our tomb is the center focus where our Opening takes place.

It was constructed with a wood frame covered with chicken wire and initially the kids covered it with paper mache.

We have since re-coated it with drywall compound, painted it and it really looks cool.

The stone is in front except for Easter Sunday, when it has been rolled away, bright glowing lights and Jesus's white linens laid on the tomb. Very beautiful & effective.

This thing is life size and takes up a corner in our Luther Hall. It is 3 years old now and needs touched up now and then. The kids and visitors love it.

Cathy W. for Disciple Builders of Trinity Lutheran Church, Findlay, Oh

Update:  Photos added showing the tomb Cathy talks about.  Second photo is the kid's doing the story of the Good Samaritan and the tomb becomes the Inn (it shows a good view of how the tomb is built into the corner of a room - very creative! - and so useful for other dramas!)

3 TLC Easter Tomb

2 TLC Good Samaritan Jan Feb 2003

Attachments

Images (2)
  • 3 TLC Easter Tomb
  • 2 TLC Good Samaritan Jan Feb 2003
Last edited by Luanne Payne

At a seminar several years ago, a friend, Nancy set-up the empty tomb she used with little ones at her church for demonstration in the preschool workshop.

When the children went to look inside the empty tomb they would find an angel (a very large doll dressed as an angel - with a flashlight lit under her so she glowed).

She said the children were captivated by the whole experience.

Large fridge box covered by beige bed sheet, in front large piece of cardboard painted to look like a rocky hill, both box and hill have a entrance hole cut into them. Then a piece of cardboard, the rock, that can be rolled to the side to reveal the entrance.  Added artificial grass rug and fake plants.

Attachments

Images (1)
  • DSC00788
Last edited by Luanne Payne

How to make an Easter Tomb "Stone"

(that can easily be rolled and will also work with Black Light)
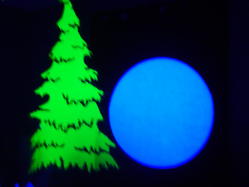
DSC03057DSC03050

Options: You may want to take a permanent black marker and give your STONE a look not quite so round, and with some crevices.   Although, if you leave as is you will also have a nice large MOON!

Note:  pdf files with a list of supplies and directions (with pictures) included at end of this post. 


Sewing Option:

Supplies:
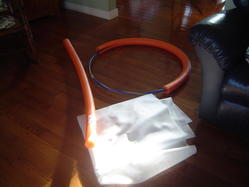
DSC03008

  • 1 - Hula Hoop (approx. 30” diameter) – suggest you don’t buy a really cheap, easily bendable one, but one that is more solid.
  • 2 - Swimming Noodles (reg size)
  • White Felt - purchased off a 72” width Roll
     – length required  3 ½ ft. (1.2 yards) 
  • White Elastic (1/4” width by 70” length)
  • Black Thread, Straight Pins
  • Scissors
  • Black Duct Tape
  • 2 – Safety Pins
  • Sewing Machine
  • Black Marker
  • Letter-Size Envelope (used for measuring)

By adding the noodle, the extra width allows for the student to easily roll the stone!


Glue Gun Option:
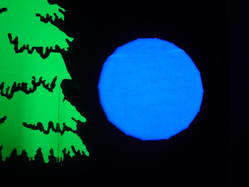
DSC03094

Note:  The Hula Hoop I used to make this sample was old and badly bent, to straighten I had to cut out a piece making it only 22" in diameter when I was done, rather than the 30" one pictured above.  I also used the left over felt from the above project and had to sew two pieces together to make it big enough, which gave me a seam.  As you can see in the picture the seam isn't too obvious, but for a bigger hoop you would see approx. another 8 inches of seam.

The finished result was it had a nice bumpy rim, more like a rock.  Though I'm not sure how well the glue will hold up to the noodle over time and use.

Supplies required for this option:

  • 1 - Hula Hoop (approx. 30” diameter) – suggest you don’t buy a really cheap, easily bendable one, but one that is more solid.
  • 2 - Swimming Noodles (reg size)
  • White Felt - purchased off a 72” width Roll
     – length required  3 ½ ft. (1.2 yards) 
  • Scissors
  • Black Duct Tape
  • Glue Gun (Glue Sticks)
  • Black Marker
  • Letter-Size Envelope (used for measuring)

Zip Tie Adaptation:

Because felt is very tear resistant, you could also use zip ties instead of glue.

Directions:  Wrap a tie around the noodle and slip one end through a slit in the felt, then thread the tie and pull tight. 

As there are 101 wonders of using zip ties keep a pack in your kit for quick fastening, holding up, and fixing all sorts of things you can't/don't want to glue or tape (or sew).


More info on Black Light Theater Instuctions, by Luanne Payne & Janice Loeb. Which is an article found under the Drama Workshop Design Forum at this site.

Attachments

Last edited by Luanne Payne

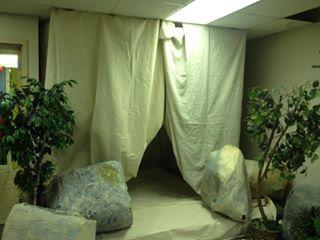
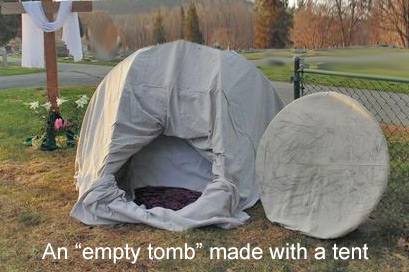
Here's an "empty tomb" display you can make with a pop-up tent and cleverly painted canvas tarps.

Empty-Tomb-Tent

I've had this image in my files for a few years and don't remember which church gave it to me (Highland something?)

Attachments

Images (1)
  • Empty-Tomb-Tent

Add Reply

Post a New Topic
Lesson or Resource
Rotation.org Inc. is a volunteer-run, 100% member supported, 501(c)3 non-profit Sunday School lesson ministry. You are welcome to borrow and adapt content for non-commercial teaching purposes --as long as both the site and author are referenced. Rotation.org Inc reserves the right to manage, move, condense, delete, and otherwise improve all content posted to the site. Read our Terms of Service. Get a free Registered Membership or become a Supporting Member for full access to all site resources.
Rotation.org is rated 5 stars on Google based on 51 reviews. Serving a global community including the United States, Canada, United Kingdom, Australia, New Zealand, S. Africa, and more!
×
×
×
×
Link copied to your clipboard.
×
×