Flannel boards (flannelgraph) are most often associated with storytelling in the preschool classroom, but they are also useful when telling a story to older students. Yes, they seem old-fashioned to us, but to a child raised with an iPad always at hand, the static pictures and orderly placement of pieces can be quite engaging on occasion. Consider using felt figures as you retell a Bible story that is too long to read directly from the Bible during class.

Share your flannelboard ideas, resources, sources, and construction ideas below.

Original Post

Replies sorted oldest to newest

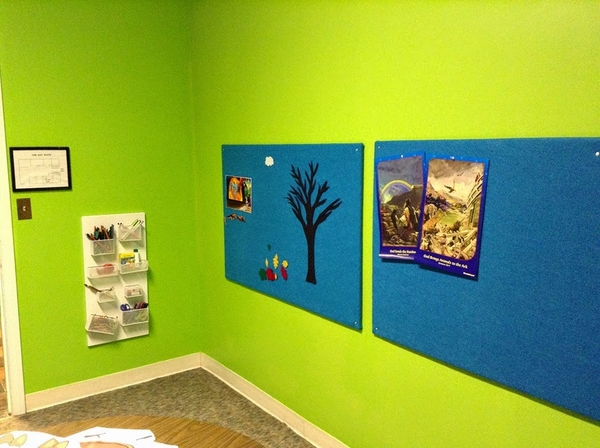
When I redid my 1940s classroom, I stripped it down to the plain walls and one table. I took the bulletin and chalk boards down and the shelves and brackets off the wall and got rid of the storage cupboard. Then I scoured Pinterest for ideas of how to create an enticing classroom in a small space.

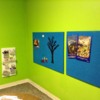
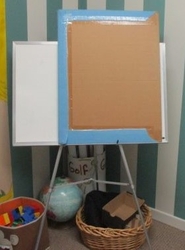
I saw cool flannel boards on Pinterest that were placed low enough for kids to play with. I decided to make my boards shorter and wider than the tall and narrow boards on the original Pinterest post. I had the vision of having felt cutout pieces from Bible stories available for the kids to play with when they arrived early.

remodeled room

These flannel board construction instructions are adapted from one of my favorite blogs, Apartment Therapy which has great DIY ideas for small spaces.

Supplies:

  • Two 48 x 32-inch pieces of Homasote or other brand of wallboard (available at home centers) or foam-core board (available at art supply and craft stores)
  • Two 54 x 38-inch pieces of felt in bright colors
  • Staple gun
  • Scissors
  • Wall anchors
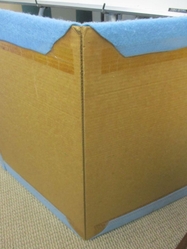
  1. Center a board on a piece of felt. Wrap the felt to the back and staple at the center of each side. Make sure the felt is even and tight. Continue stapling, working to within 6 inches of the corners.
  2. To miter the corners, fold the felt corner point in toward the board. Staple it in place along the edges of the board, then trim away the point.
  3. Fold down the "ears" that remain and staple them in place to finish the miter.
  4. Find someone to hang the boards for you


Felt figure sources:

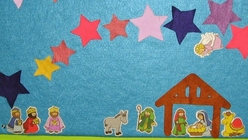
OrientalTradingFeltI purchased the pieces for the nativity scene from Oriental Trading. The kids love playing with it at Christmas. (It is a seasonal item. Keep your eyes out for it.)


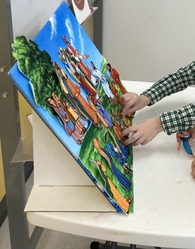
LukenFeltBetty Lukens has some great flannel graph sets. Pictured at left is one of the stories from a Betty Lukens Felt Book Activity Kit. The activity kit pieces are a lot smaller than their other offerings. The upside is that I got 8 stories for $15.00! They sell regular sized felt stories and even giant sized ones.

Betty Lukens also sells sets using the pictures and characters as drawn in the Beginner’s Bible. I have been drooling over these for a long time!


1-Kid Frugal Logo [800x318)

Moderator's note: This resource is from Rotation.org member Joan Eppehimer's KidFrugal blog, which she is sharing here at Rotation.org in order to preserve it for posterity and make it available more widely with our community.  It is part of a large group of lessons and resources that she developed to make "ministry happen when there are no resources to make it happen." Thank you, Joan, for sharing your creativity with our community!

You can read more about Joan and her ministry here.

Attachments

Images (4)
  • 1-Kid Frugal Logo (800x318)
  • LukenFelt
  • OrientalTradingFelt
  • remodeled room
Last edited by Amy Crane

Sometimes straight up and down flannelboards as suggested by Joan above don't hold as well as slanted ones. (I think it might depend on the type of fabric used for the background and the felt pieces. Or maybe it is the humidity?)

feltboardYou can use Joan's construction instructions to make a flannelboard the is not attached to the wall and put it on a easel so it has a slight slant to it.

Or you can purchase  or make a free-standing flannelboard as shown at right.

Another option is to hang a large sheet of galvanized metal with trim around it (or just use your classroom whiteboard if magnets will stick to it) and put magnets on the backs of your story pieces.

Attachments

Images (1)
  • feltboard

Books of the Bible Flannelboard Idea

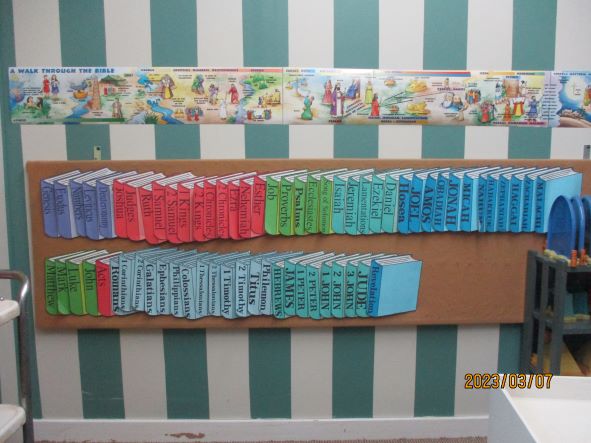
How we converted a long bulletin board (8' W x 2' H) into a Flannelboard to showcase removable "paper" Books of the Bible Cards, see further details below.

We covered the old bulletin board in brown flannel (purchased at local fabric store) and attached it by stapling it along the back of the wood frame. We hung it using metal brackets screwed into the back of the board frame and then to the wall.
Flannelgraph Books of the Bible 1

Here it is shown above, I later added a bible timeline (hung with removable Velcro strips). I plan to eventually add bible maps above the timeline.

How I made the Paper Flannelgraph Bible Books:Cardstock Bible Book 1

I created the graphic in a Word document to fill a page.

I added a text box on the spin with the text direction running down, top to bottom.

I printed the books on 8 1/2" x 11" colored Cardstock Paper (65 lb), a different color for each division, example: Law--Purple, History--Red.
Hmmm, some of the books in top photo show white inside pages, I think I did those in a paint program, but the easiest way is to simply print on colored cardstock, like the Daniel book pictured.

I've attached two PDF files I created:
1) 66 Books of the Bible Book Cards.Placement of Velcro on back of Bible Book Cards
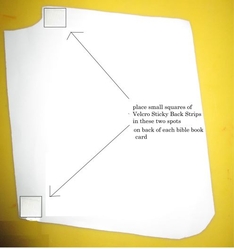
2) Directions for Printing Cards:  page numbers to print per your color choices, etc.

How to Hang Books on Flannelboard:
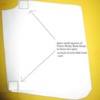
flip over each Bible Book Card and place two small square pieces of "Sticky Back Velcro" strips on back, as indicated in photo to the right.

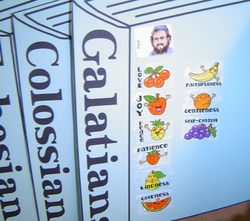
Over the years we've added picture stickers depicting who wrote the book and stories found inside (when I could find them).
Example below: Galatians we added a Paul and Fruit of the Spirit stickers.
Tent 2000 6e

A few sources for stickers:478524

  • "People of the Old Testament" and "People of the New Testament" -- Sticker Books, by Daniel Vium, Scandinavia Publishing House / both 2013.
  • "Faith That Sticks" Sticker Series by Tyndal House (example: Armor of God Stickers.)

How we use the Books of the Bible Flannelboard

  1. When we are doing a story the kids are asked which bible book today's bible story is found in.
  2. Then someone is sent to wall to find that book.
  3. We count to see what number it is and what division/group it belongs to (History, etc.). We review if they don't remember.
  4. They then pull the book off the wall and bring it to the group and we check to see if there is any information provided on it (stickers) or if not we add stickers if I have them.
  5. When we are done with the Bible Book study it's placed back in it's spot on the flannelboard.

Note: You could also write details on each bible book card (back & front) if you wished.

Thoughts on using it for games: I've never used it for sorting or learning the book of the bible order games. If I was making one for that purpose I would want to make sure to glue the flannel directly to the entire bulletin board, ours is not. I would also want to laminate the bible book cards.

Attachments

Images (5)
  • Flannelgraph Books of the Bible 1
  • Cardstock Bible Book 1
  • Placement of Velcro on back of Bible Book Cards
  • Tent 2000 6e
  • 478524
Files (2)

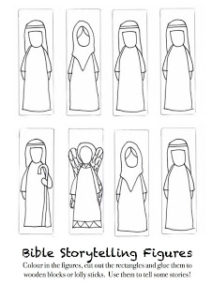
Bible-storytelling-figuresHere are some great (free) patterns for generic "Bible people."   (PDF is at the linked site.) I like these people because you can add your own facial expressions as needed.

Or the students can add faces and color them!

A trick I learned using flannelboards in library storytimes - you can draw or trace the figures onto sewing interfacing - the sew-in (not fusible), non-woven kind - it is see-through enough for tracing. Then cut out the figures and color them with markers. The interfacing is lightweight and sticks well to flannelboard surfaces. (Figures on interfacing are lighter-weight than ones on paper with felt or sandpaper attached to the back to make them stick to the flannelboard, but those work, too.)

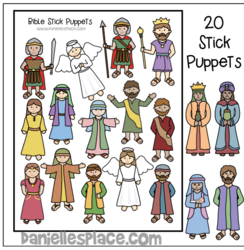
Daniellesplace.com.Bible.characters


Daniellesplace.com also has a good "generic" Bible characters that you can purchase for a nominal fee and trace to use for flannelboard stories.

Attachments

Images (2)
  • Bible-storytelling-figures
  • Daniellesplace.com.Bible.characters

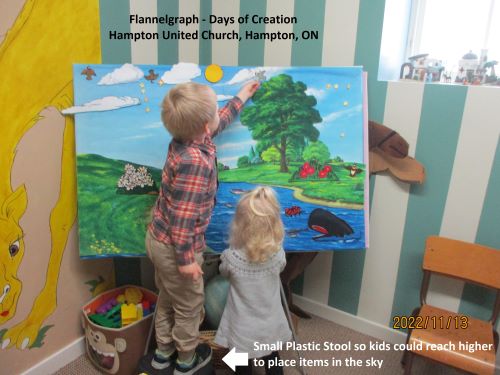
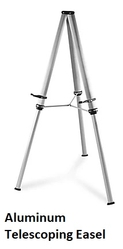
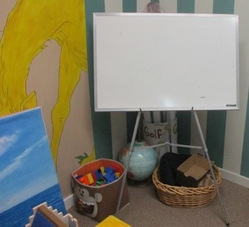
We have our Flannelboard sitting on an "Aluminum Telescoping Easel".

Rather than raise and lower it for different ages, I have a couple small plastic stools handy for when the younger children need one step up to add higher items, like stars, clouds and birds as when we did Creation pictured below.

We have had a Deluxe Bible Set by Betty Lukens for years and all ages enjoy it to this day.

Flannelgraph-Creation-ResizedAluminum-Telescoping-Easel

Aluminum Telescoping Easels are expensive, but we've had ours for years and was well worth the cost.

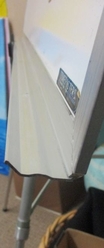
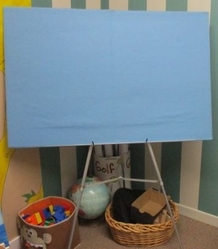
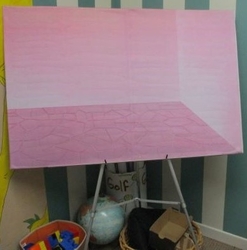
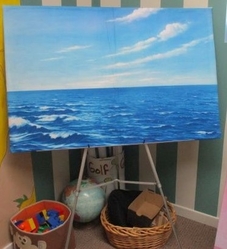
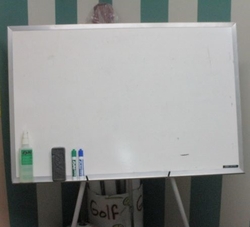
On the stand we keep 4 items handy: first a White Board, and sitting on top of this are our three flannel backgrounds (plain blue, water/sky, and an indoor scene). Whichever scene we need we just move it to the front. It sits in the corner of our Story Table Room and the 2 boxes of flannelgraph people/objects/scenery are stored underneath our Story Table for easy access.

Flannelgraph_stand-1Flannelgraph_stand-1aFlannelgraph_stand-5

Flannelgraph_stand-2Flannelgraph_stand-3Flannelgraph_stand-4

I like to keep it interactive so I lay the story pieces on top of the story table where the students can easily select pieces themselves, as they come up in the story, and place on the flannelboard.

Lay pieces out for easy access for students

If we need the White Board we simply remove the 3 background scenes and lean them against the wall.

Flannelgraph_stand-1b

We use the White Board in games to track our scores or for games that involve drawing, like Pictionary.


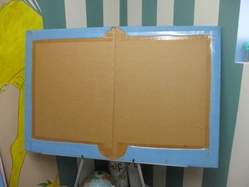
To create your own flannelgraph background  simply attach a large piece of flannel to a piece of cardboard that you have partially slit so it will fold in half, an easier size if you need to store it elsewhere. Wrap flannel around to back, trim flannel at cardboard bend (see V cuts below), so cardboard will still be able to fold. It's been quite some time since I did this, but I think I also glued the flannel to the cardboard (using white glue) and then used packing tape along the back, as pictured below, surprisingly it has held up well for years.

Flannelgraph_cardboard-backing-1Flannelgraph_cardboard-backing-1aFlannelgraph_cardboard-backing-1b

Attachments

Images (13)
  • Flannelgraph-Creation-Resized
  • Aluminum-Telescoping-Easel
  • Flannelgraph_stand-1
  • Flannelgraph_stand-1a
  • Flannelgraph_stand-1b
  • Flannelgraph_stand-2
  • Flannelgraph_stand-3
  • Flannelgraph_stand-4
  • Flannelgraph_stand-5
  • Flannelgraph_cardboard-backing-1
  • Flannelgraph_cardboard-backing-1a
  • Flannelgraph_cardboard-backing-1b
  • Lay pieces out for easy access for students
Last edited by Luanne Payne

Add Reply

Post a New Topic
Lesson or Resource
Rotation.org Inc. is a volunteer-run, 100% member supported, 501(c)3 non-profit Sunday School lesson ministry. You are welcome to borrow and adapt content for non-commercial teaching purposes --as long as both the site and author are referenced. Rotation.org Inc reserves the right to manage, move, condense, delete, and otherwise improve all content posted to the site. Read our Terms of Service. Get a free Registered Membership or become a Supporting Member for full access to all site resources.
Rotation.org is rated 5 stars on Google based on 51 reviews. Serving a global community including the United States, Canada, United Kingdom, Australia, New Zealand, S. Africa, and more!
×
×
×
×
Link copied to your clipboard.
×
×