In addition to the other posts in this topic and in all our Bible Story lesson forums, this topic is collecting your creative ideas for teaching with art in Sunday School.
Reply below and tell us how it helped teach your Bible story. Include pictures!
Replies sorted oldest to newest
Art is my favorite workshop. Thinking and creating this list has included a fun bit of nostalgia. (A place where one can get when you've done so many years of the Rotation Model.) ![]()
- Fish prints with real fish - my all-time favorite art workshop! "They" wanted to buy fake, wooden fish to use instead, but I wouldn't let them!
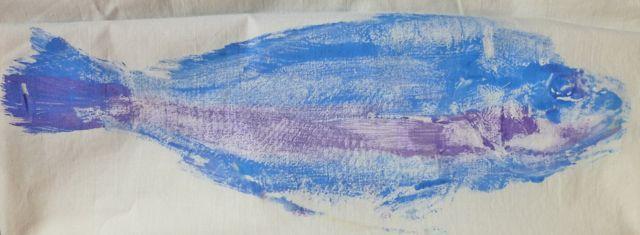
We've done this several times in our years of using the Rotation Model. Originally with a Rotation on the Feeding of the 5000; most recently during a Rotation on Jesus Calls Disciples. 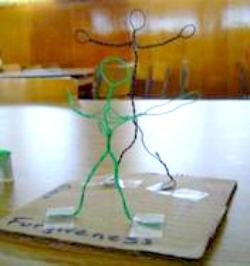 Old telephone wire (is this stuff prehistoric now?) to make wire sculptures for a Rotation on the Prodigal Son.
- Tie-dyed t-shirts made for a Rotation on Joseph’s Coat. (Made a mess but the kids sure enjoyed it. How proud they were to wear their shirts! And amazing how they learned the whole story.)
- A glass plate, old magazines, & decoupage medium to decorate a celebration plate for the Last Supper. (A family keepsake!)
 Prayer rocks for a Rotation on the Lord’s Prayer. (My son kept his prayer rock by his bed for 4 years!)
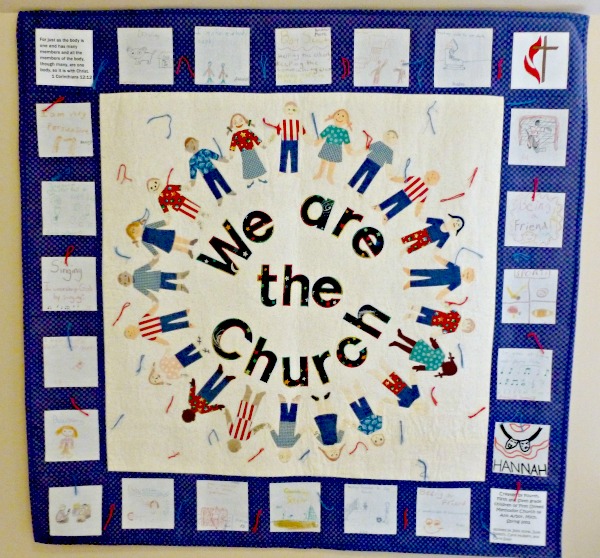
- Fabric cut with a dye-cut machine into people shapes to make a quilt - as a part of a Rotation on Early Church as the Body of Christ.
- AMACOTM Sculptamold – to make tablets in a Rotation on the 10 Commandments.

- Cement & pieces of stained glass – stepping stones for Jacob and Esau. (Note: You must be a Supporting Member to access this lesson.) Mosaics can be done with lots of different materials besides tiles or glass. Use cut up pieces of paper or duct tape.
- Illuminated manuscripts done of the names of Jesus, for a Rotation on the Prophecies of Isaiah with regard to Jesus' birth. (Think "names of Jesus.")
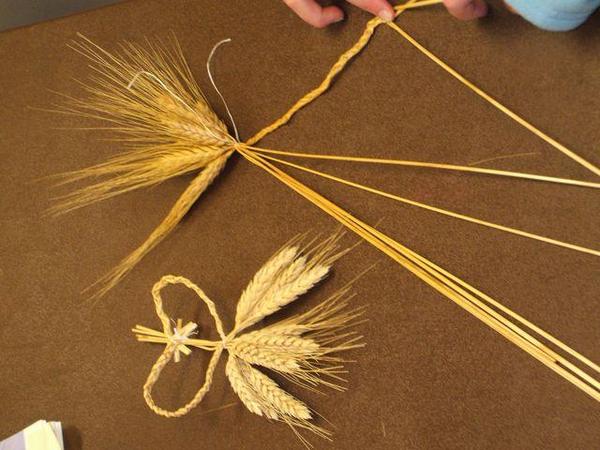
- Wheat weaving done for a Rotation on Ruth & Naomi.
- Modelling clay and plastic box picture frames to create a "sower" scene for a Rotation on the Parable of the Sower.
- Mosaics can be done with lots of different materials besides tiles or glass. Use cut up pieces of paper or duct tape.
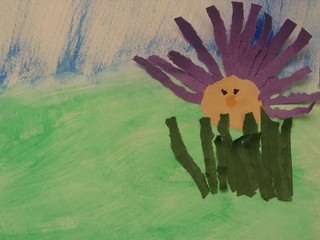 Collages using torn paper is another way of sort of doing "mosaics." We used this technique for a Rotation on Adam and Eve. (Note: You must be a Supporting Member to access this lesson.
- Micrography to create a burning bush scene for a Rotation on Moses: Bulrushes To The Burning Bush. (Best with older students because it requires the skill of writing small.)
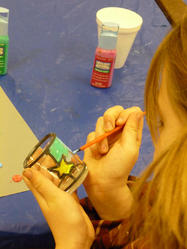 Glass paint - Created stained glass votive holders for a Rotation on Jesus' overall birth story. (Another family keepsake.)
- Marbleize paper and then create a prayer box for a Rotation on Esther. (Or could be used for the Lord’s Prayer or for any other Rotation where the focus is on prayer.)

 Notan - an art form that focuses on positive and negative space - used for a Rotation on Peter's Restoration (John 21:1-17). (Note: You must be a Supporting Member to access this lesson.)
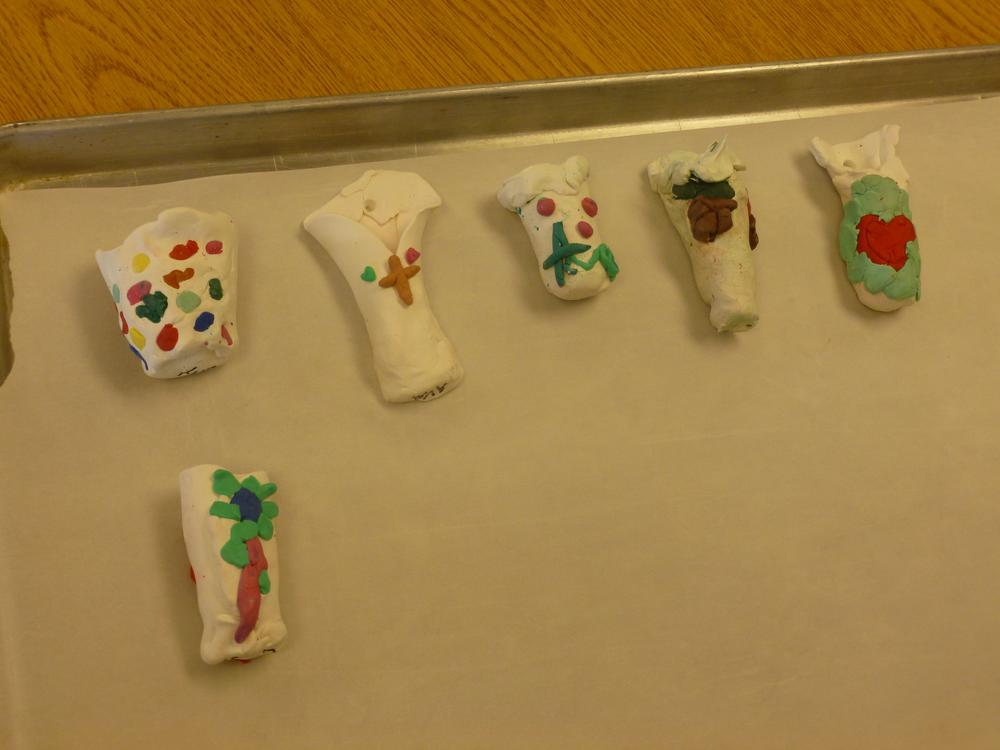
- Create clay mezuzah-like cases (muh-ZOO-zuh) using Sculpey clay, for a Rotation on The Greatest Commandment
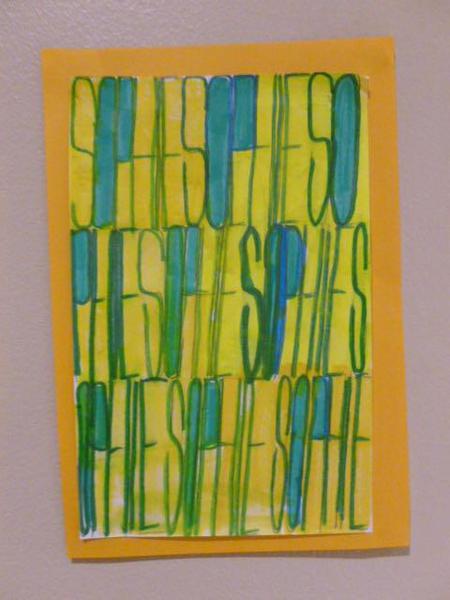
- Using the style of a particular artist to create artwork. For example, “name art” in the style of artist Paul Klee. We used this for our Rotation on the Anointing of David as King but would also work for creating the names of Jesus’ in his birth through the eyes of Isaiah or “I am” lessons or Jesus' Resurrection through the eyes of Mary Magdalene. (Note: You must be a Supporting Member to access this lesson.)
- Make books or narrative picture scrolls that tell the sequence of events of a story. We've used this idea for Rotations on Joseph in Egypt (use hieroglyphs) and on Jesus as a Boy in the Temple.
- Marble painting to indicate a story with lots of activity and moving! We used this one for Jesus as a Boy in the Temple where we used the resulting paintings as the cover to books created to tell the story.
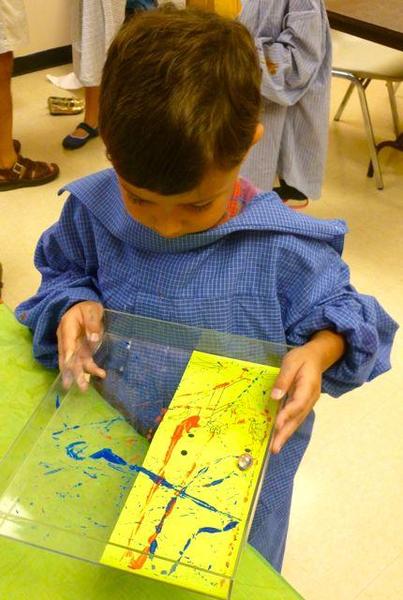
- Woodworking! (Another favorite.) Find the handyman (or handywoman) in your congregation who would love to share their craft. We did this to create "peace houses" for a Rotation on Joseph's Coat.

What are your favorite art projects?
Pictures are very helpful. Need assistance uploading a picture? Send your photos to contact.rotation@gmail.com.
Attachments
"FLOAM"
It's like "slime" but because it is full of mini styrofoam balls, it holds its shape. Your kids can even help make it.
A good how to make your own can be found at https://teachingmama.org/homemade-floam/
and at https://www.momdot.com/homemad...am-diy-floam-recipe/
Lots of good youtube videos with recipe variations too.
Attachments
Our kids really enjoyed the Copper Foil "Tooling" or "Embossing" that we did last Easter.
The lesson taught the students about different types of crosses. I made large examples out of cardboard, and then spray painted them and hung them from the ceiling. The crosses that the kids took home were made using "cooper" colored "tin foil" sheets (available in art supply stores and online at places like DickBlick.)
We had nine different crosses: Tao, Jerusalem, Celtic, Anchor, Maltese, etc. (Finding the crosses and their shapes/meanings is easy to do with Google).
- The students were directed by the teacher to draw each cross as it was discussed on a piece of paper.
- They were then instructed on how to work with copper metal sheets (purchased from Dick Blick).
- They then choose a cross that they wanted to "tool" (press into the metal).
- We gave them pre-cut pieces of cardboard, and they wrapped the metal around the cardboard to form a square and to keep the edges of the foil from scraping hands. (Tip: add some tape to the back to cover exposed edges.) The cardboard acted as our soft backing into which to press the metal. You could also forgo the cardboard backing so that the kids could work both sides of the metal.
- By working on the back of the copper and on the front, they were able to make the image both raised and recessed. Soft pencils and wooden craft sticks were good tools.
- After creating the "embossing" of the cross, we gently rubbed them with steel wool to make the raised images reflect the light differently.
- Add additional designs or words around the raised cross by pressing into the metal.
- They finished the pieces by using colored sharpies to enhance the piece. We then helped them place a taped loop of wire on the back, so that they could be hung.
I know that this has been one of the most favorite art projects, and it was a good way to talk about the cross, and how universal and important the cross is.
There are lots of variations on metal tooling/embossing which you can show the kids or they will discover.
Tips on working with tin-sheets
1. Edges can be sharp, prepare squares ahead of time and fold over and hammer/press the edges.
2. Have newspaper and pieces of felt to lay under the metal sheets so that they "give" when pressed.
3. You can place an object UNDER the sheet and use a tool to push the foil down around its edges. Or you can trace the object onto the back side of the sheet and press into the metal around the object to create a raised "relief" on the copper side.
4. Use a stiff sanding block to lightly sand away the copper color on the RAISED portions of the metal sheet., or use a piece of sandpaper to while braise any area for effect. (Experiment with different techniques)
5. Use a hole punch to add a yarn hanger.
6. Use silver tin sheets then color like stained glass using permanent markers.
Attachments
For Samuel we decorated pillow cases with fabric markers. The kids created a design on paper and put that paper inside the pillow case. The design was visible from the outside so it could then be traced. The results were astonishing. Designing on the paper first was key because it prevented costly "do-overs." Giving each child a pillow case was a bit pricey but worth every penny because we did this two years ago and kids still tell me about how much they enjoy dreaming on these pillowcases. We sent home a Xerox of the instructions for laundering the fabric markers to help parents know how to preserve these treasures.
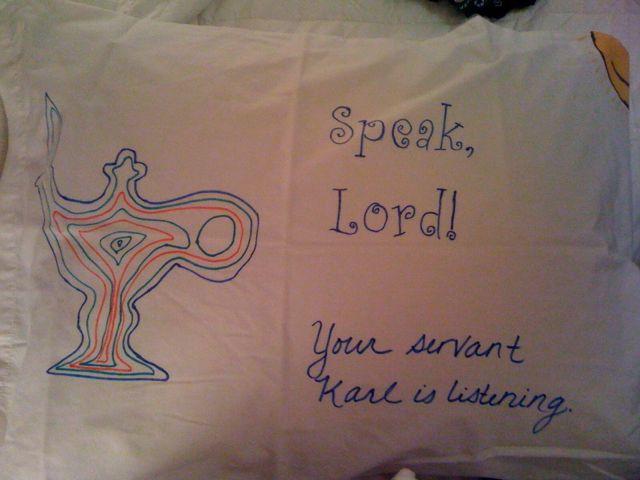
This project would work for any dream stories: Jacob, Joseph, etc.
-------
Rotation.org Moderator notes: See Anne's lesson where they made the pillow cases here.
Some of my favorite projects, and the ones that went over the best with the kids included:
* Wire sculptures for the story of Moses--we used the green florist wire for the sculptures and small pieces of firewood (with the bark still on) for the bases. The kids fashioned the wire into whatever they visualized from the story. We had some pretty interesting designs and storytelling pieces. We also did this with a lesson dealing with emotions and that was really cool. Lots of twisted wire and long spirals and crazy stuff.
* We also tie-dyed t-shirts for the story of Joseph and his coat of many colors and the kids absolutely loved it. I recommend using a kit from Michaels or another craft store rather than the Ritz dye, the colors are brighter and last longer.
* Right now we're working on creating "Peace Tiles." Each child is creating their own mosaic using craft mosaic pieces --fixing them to 8"x8" plywood squares. When they're done we'll connect them with eye-hooks and wire and hang the whole piece in our churches companionway. We cut extra tiles as well in case anyone in the congregation would like to create their own peace tile to add to the project.
Good luck with your projects![]()
 Sculptures
I posted my three favorite SCULPTURE MEDIUMS over at
https://www.rotation.org/topic/art-method---sculptures-using-various-materials-pvc-pipe-tin-foil-wire-etc
PVC PEOPLE/SCENE sculptures
Tin Foil sculptures
Wire sculptures
I also included by reasons why Sculpture is a GREAT medium for kids.
<>< Neil
Attachments
Students blow air through a straw to move paint around on the canvas.
Water down some poster paints and spoon a small amount onto canvas. Use straw to blow the paint into the shape you want.
You can also put a bit of paint in the tip of the straw and blow it or drip it into place.
You can also add definition to your shapes by drawing in the paint with the tip of the straw or blunt end of a brush. Experiment.
Works best with medium/larger areas to paint, not small areas.
Results can be a bit abstract. Consider sketching general shape first.
A Few Topic Usages:
Breath of God
Holy Spirit
Pentecost
Burning Bush
Earth, Wind, Fire (Elijah)
Psalm/Praising Forms/Shapes
Pillar of Cloud/Fire, presence of God
Expressions of Joy
Light in the Darkness
Originally submitted by Neil MacQueen.
Decorate light switch plates with Bible verses and images using paint pens or permanent markers.
Use glow-in-the-dark paints and stickers.
You can also glue/decoupage images onto a light switch plate.
Lightswitch plates are very inexpensive.
Some Light Verses:
- You are the light of the world.
- Don't hide your light under a bushel.
- In him was life, and that life was the light to all.
- Thy Word is a light unto my path.
Attachments
Our favorite Art project so far, has been the String Art for the "Miracles of Jesus, Jesus feeding the 5000.
You've probably seen this project before. You pound nails into a piece of wood in the shape of whatever you want to remember (in this case, fish), then weave different colors of yarn from nail to nail.
"Hammering in the story" so to speak ![]()
We first had the kids trace their drawing on a piece of tissue paper, then taped the paper to the piece of wood to act as a template for "where to nail."
We used a variegated color yarn. (2 choices-green/brown or blue/green) they tied the yarn to one nail and wove the yarn around the outside pattern of the fish, then zig-zagged to their hearts content around the nails. up, down, sideways...whatever.
When they had covered the board adequately with yarn, they tied off on one of the nails.
They loved driving the nails and creating their unique art piece. Even though they were all similar, by giving them options in yarn color they still had unique string art. You could also allow them to use both yarn colors...one for the outline weaving and fish fins and another color for the body of the fish.
The kids looked at what they created and were clearly surprised at how cool it looked and that they did it all by themselves, and want to do string art again soon.
I'm thinking Joseph's coat of many colors would be really cool using several colors of string or yarn. It was pretty loud with all the hammering, but they were only driving the nails about 1/3 of the way down, it really didn't take long and the kids loved it. No injuries either! we used small hammers, small nails and small taps. Easy even for the 1st graders.
Note: Marie's idea was used by another member! Lesson plan here with more photos. It was originally written for younger children but could be adapted.

Attachments
For the month of February, we created a rotation of lessons about "Love." Loving God with everything you have, and loving your neighbor as yourself.
We used the same memory verse, but each workshop focused on a different aspect of the verse. In the Art Workshop, we focused on remembering to love God and express our love in prayer and action. To remember these ideas each day, we had the kids make Mezuzahs with homemade air dry clay.
A Mezuzah is a small Jewish prayer box with a Bible verse inside it. The mezuzah attaches to your doorway. It is a reminder there that as you go out into the world to remember the verse (about love, in this case).
Google "mezuzah crafts for kids" and you'll see many options, including this clay mezuzah you can make out of air-clay and can paint it. Notice that their mezuzahs are open at the top so you can slip in and take out the Bible verse scroll. Ours were decorated to match our story theme.
Editor's Note: You can also buy plastic mezuzah's to decorate. Google "Plastic Mezuzah Cases For Decoration"
This lesson on the Greatest Commandment makes mezuzahs from Sculpey™ clay.
From Chadiscrafts.com
Attachments
Fun art projects -- we've enjoyed so many over the years. Here are a few that we especially enjoyed:
Alcohol ink tiles for the Creation Story. Loved this medium and how unique and beautiful each tile was! Will have to look through old files for a picture, but you can see beautiful samples by googling Alcohol inks.
Melted crayon art for creating the furnace for Shadrach, Meshach and Abednego. The kids loved this. The photo doesn't show it, but they also added a key word from the story that was especially meaningful to them -- faith, courage, strength, brave, etc.
Torn fabric (and tulle) Baptism Banner - this is one of my all-time favorite activities. Kids and their parents helped (we even had toddlers helping). I tore the strips beforehand (different shades of blue cotton) and cut lengths of tulle and sheer and glittery ribbon. We sorted them and set them out in piles. Kids just looped the strips over a curtain rod (could also use a large dowel or closet rod) and pulled through making a simple knot. We added baptism symbols made of card stock covered in white satin. This is displayed in the sanctuary/worship space when we have a baptism at church.
Prayer Beads - we have made prayer beads for several different stories/occasions (general prayer, to sell for missions) but these were special for Psalm 23. Each bead represented a key part of the prayer and we encouraged kids to use them to help them memorize the psalm.
Mosaics - mosaics have been mentioned here already. But here are some different ways to use them. We've made mosaic stepping stones, flower pots, concrete benches and this photo which is a bird bath (made with a plant saucer glued to an upside down flower pot). One of our most popular activities was to made several as joint projects and then sell to raise $$ for missions. We've also found that using the little flat marbles instead of actual broken glass pieces is easier for kids and turns out really well! This bird bath sits in a special garden alcove near our church entrance.
Weaving - a fun but challenging project as a culmination of our summer long study of David's life. We did individual weavings (using paper plate looms that were pre-warped before class!) and also a large group weaving. I loved the kids' creativity -- they chose materials that represented the different parts of David's life to create the weaving. The large weaving was done on a hula hoop using torn t-shirt strips as the warp. They also added some charms that reflected his life -- a cross to point to the promise of the Messiah, musical note, etc.
Attachments
I've always wanted to do temporary Pentecost Flame Tattoos with my kids.
 A few years ago, we used sharpies to make some "temporary" tattoos of the Great Commandment circling student wrists like one of those rubber wristbands. The problem is that we didn't have any talented artists among us, so most of the symbols and letters ended up looking like smudges and "prison tats." Nevertheless, the kids liked it.
So imagine my surprise when I saw"Temporary Tattoo Paper" at JOANN's one day. You create a design and text on your computer, print it on special tattoo paper using your standard inkjet printer, then apply with a damp cloth --i.e. just like real temporary tattoos. (Apparently, this is how many tattoo shops now do it for people who want to make sure before they get a permanent version.)
Below is an instructional video on YT for using Silhouette Temporary Tattoo Paper. There are other videos and the transfer paper is widely available.
This would be a fun project for a Computer Workshop or any classroom that had a computer and printer. You can use WORD to create text and insert images. You could print up sheets full of keywords and various symbols, cut them into small pieces for transferring, and let the kids put together "tat words and symbols" on their forearms.
For the Pentecost Tattoos idea... Do a Google search for "Pentecost clip art" and you'll find tons of good Pentecost images you can insert into a Word Doc and print on transfer paper.
"Tattoos" (sort of) in the Bible
Deuteronomy 6:6-8 (NRSV)
Keep these words that I am commanding you today in your heart.
Recite them to your children and talk about them
when you are at home and when you are away, w
hen you lie down and when you rise.Bind them as a sign on your hand,
Fix them as an emblem on your forehead.
Attachments
Book making is a great art technique for stories with multiple scenes that you want to sequence and remember and also for lesson where you are listing things (such as blessings in this art lesson).
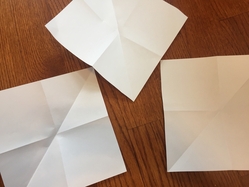
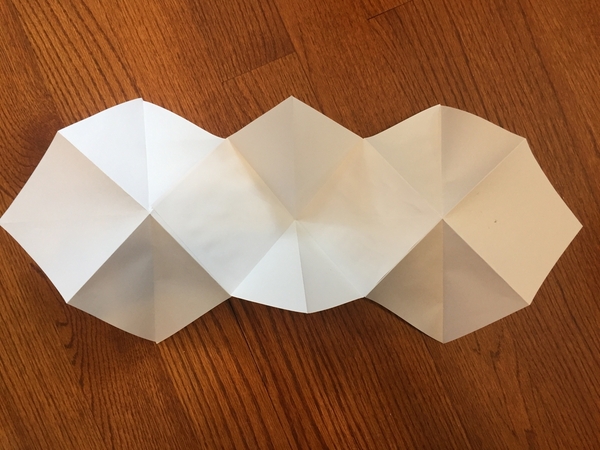
A fun technique is explosion books (also called caterpillar books, folded squash books, and accordion books).
They are made from squares of paper (4" squares will give you 2" squares and triangles for the panels/pages in the book).
The squares are folded and then glued together. The students then flatten out the folded book and decorate it -- with paint, markers, whatever, or by gluing smaller squares or photos onto the "pages."
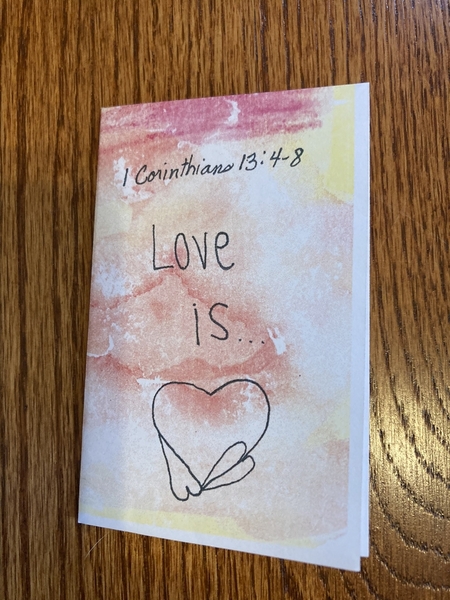
And here is a different folded paper technique to make a small book called a "Zine" that you can make color copies of and share with others (an art + mission workshop!).
Attachments
I came across this neat art ideas for kids website named "Hello Wonderful. It's one of the better ones I've seen and has a lot of inspiration for all sorts of art projects you could do for a Bible story.
In particular, I liked this BUBBLE ART page that uses a unique bubble blower that you make out of a recycled water bottle and some mesh.
 We made these at home and they were indeed a blast and simple to make. They work just fine with liquid dish soap and some water (no need to buy bubble solution or glycerin because the mesh makes MOUNDS of bubbles, not the single bubble-kind that blow away. Use Dawn Free and Clear or other clear dish soap, then mix in some water and watercolor paint or acrylic and you have a fun art medium that could be used for many stories.
What else creates with "breath"?? The Holy Spirit, of course.
See my Pentecost Acts 2 art mural idea using this technique!
I'm also using the idea for a Fruit of the Spirit lesson I wrote with our Writing Team.
https://www.hellowonderful.co/...ubble-art-with-kids/

Images used with permission from hellowonderful.co
Attachments
I'm a fan of decoupage (mod podge gluing) tissue paper to just about anything --plastic bowls, jars, picture frames, lanterns, etc. Easy for all ages, fun, and you can get quite creative with it. Love the hard finish the mod podge gives the final product.
So imagine my glee when I came across ANOTHER use for Mod Podge and Tissue Paper: Creating A Decoupaged MAP with built up areas for mountains, etc.. This is an easy and fun to create map project using shades like brown, yellow, green, and blue tissue paper for the terrain
It's also REALLY EASY to fold the tissue into peaks, hills, and mountains --then Just add Mod Podge and it dries nice and stiff.
You could start with a real map copy of Israel for the story you are teaching, such as, Mary and Joseph's journey from Nazareth to Bethlehem. Choose a map that has the terrain coded in color. Glue it to a piece of foam core or cardboard, and then begin to build up layers of tissue to create map features. And yes, you can even create tiny people out of twisted/folded tissue and glue them to your map. Done it!

Attachments
I am always looking for art ideas that can be readily adapted for multi-age classes, where the techniques are simple but fun for teens and preschoolers. The bubble painting and 3-D mod-podge fit the bill nicely. Thanks.
Generating Imaginative Ideas for Painting Projects
Use Bing's free Artificial Intelligence Image Creator to GENERATE IDEAS for a student's own painting that interprets/reflects on a Bible story. After generating and discussing various ideas, the student then paints their own version of the scene onto their canvas and shares it with the class.
 To make the project extra special, use "glow in the dark" paints so that it glows in their bedroom when the lights are turned off.
Example:
I am teaching a lesson about the Empty Tomb being a sign of God's Love to all. So we did some image designing using A.I. Image Creator online --it's free.
We played with the keywords in the Image Creator application to generate many different images, which gave us a lot of possible ideas for our own creation.
Here is one of the images A.I. Image Creator came up by putting in the keywords "looking at the empty tomb shaped like a heart." The discussion around "which words" might produce certain ideas is key to the lesson.

This A.I. generated image stirs the students' creative thoughts, and they then paint the concept for display at home using glow in the dark paints.


